Showing posts with label meatballs. Show all posts

Sunday, November 17, 2024

Loubia with Lamb Kefta

Andreas and Michelle went to Iceland just before we went to Italy so we haven't seen them in a hot minute. Our schedules finally allowed us to get together to see their absolutely stunning pictures. Iceland is very near the top of our list of places to visit in the next couple of years. I can hardly wait.

Loubia with Lamb Kefta
Andreas likes to cook and likes to pick my brain to learn new things. This time, he wanted to learn about spicing and I believe he mentioned Moroccan food specifically. At the same time, Ann seemed fixated on lamb and white beans, so I decided to do a bean stew common to the Maghreb, a dish called various things in various locales.

Loubia is a stew of white beans that I have encountered often. I know it in French as tagine d'haricots blancs or cassoulet algérienne. I also know that Andreas loves my cassoulet. And I also know that because it requires hours in the oven, it is not a dish that I can show him how to make right before dinner.

So what to do?

I decided keep on with the slow-cooked beans, but show him how to make two condiments for the beans, a red sauce and a green sauce. The red sauce was my version of harissa (red chiles, cumin, coriander, fennel, caraway, cinnamon, salt, garlic, lemon juice, and olive oil). The green sauce was my version of chermoula, an analog of chimichurri (parsley, cilantro, lemon zest, coriander, fennel, salt, garlic, lemon juice, olive oil). Chermoula is a typical condiment for fish, but I love it with meat in the same way that I love gremolata, salsa verde, or chimichurri with meat.

Long-cooked and mild dishes such as this loubia can often benefit from a zesty, acidic sauce to help wake up the taste buds. Also helpful is a bright green salad with an acidic dressing, such as the one I made from arugula, julienne of apple and fennel, and a tangy vinaigrette made with Sherry vinegar.

Lamb Kefta in the Classic Shape

First thing in the morning, I put my beans that had soaked overnight in lightly salted water on to par-cook for 90 minutes. I used my old stand-by beans, Steuben Yellow Eye beans from Rancho Gordo. Into the pot, I tossed a large sprig each of rosemary, sage, and thyme which would subtly flavor the beans.

Meanwhile, I got busy making the kefta (kofta, kafta, kufta: your choice). Because I was going to serve the beans and kefta with two assertive sauces, I did not highly season the lamb as I often do. The seasonings are a lot of garlic, a decent bit of a mild paprika, some salt, and a bit of coriander, cumin, and dried chile flakes. All the seasonings I mixed into a slurry with a couple of eggs and some white wine (definitely a no-no in the Arab world; substitute any stock or cream). Then I added a couple pounds of ground lamb and a half a cup of rolled oats.

I typically do add some type of starch to my meatballs and meatloaf to loosen the texture of the cooked product so that it is not super dense. I have used panko, panade (bread soaked in cream), cooked rice, and raw rolled oats all to success. Because I always have them on hand, I use rolled oats most frequently, a bonus if you have guests who are gluten-free.

After mixing the forcemeat (with the best tool of all, my hands), I put it in the refrigerator to settle and so that the oats could start to absorb the liquid and bind the mixture. When the beans were just about at the end of their 90-minute par-cook, I shaped the kefta, diced a leek and a large carrot, and minced half a bulb of garlic.

Then it was standard cassoulet procedure from there: brown the meat (the kefta), cook the aromatic vegetables in the same pan scraping up all the brown bits (the fond) from the bottom of the pan, drain the beans and save the cooking liquid for soup, mix the vegetables with the drained beans and season, put a layer of beans in the cocotte, add the meats, top with the remaining beans, fill with a deeply-flavored meat stock to just cover the beans, and finally bake in a slow oven, replenishing the stock as necessary and punching down the crust every hour or so.

While I Cooked, Ann Set the Table and Chose Utensils and Plates
I wanted to have something to snack on while the girls chatted and Andreas and I made the harissa and chermoula. I decided on a baked feta to take advantage of the oven since it would be going anyway in finishing the loubia. This couldn't be easier to make by whipping up a roasted red pepper sauce in the blender and layering it under and over slices of feta.

The roasted red pepper sauce is a pint jar of roasted red peppers, a couple tablespoons of my homemade harissa, a couple tablespoons of the intense umami-bomb estratto di pomodoro (Sicilian tomato paste), a couple cloves of garlic (minced), and a touch of salt. Ten seconds of whirring in the blender and it's done.

I also cut up some olives (Castelvetrano) and toasted some pine nuts for garnish. I stole a bit of parsley from the bunch that I picked for chermoula as an additional garnish.

Baked Feta in Roasted Red Pepper Sauce
Olives, Pine Nuts, and Parsley for Garnish
A Couple of Italian Girls

Loubia with Lamb Kefta
Loubia is Generally Saucier; I Made This Just Like Cassoulet
Arugula Salad with Apples, Fennel, and Sherry Vinaigrette
Loubia with Harissa and Chermoula

Friday, March 1, 2024

February Celebration: The Luckiest Beans on Earth

Let's Celebrate!

Mid-February has become a time to celebrate at our house. Valentine's Day, my birthday, and our anniversary of having moved to Bend, this year our second so-called Bendiversary, all fall within a week of each other. Accordingly, we aim to have a small party each February to mark these events. What better to do in this bitter cold season than have a party?

Another February Cassoulet in the Books
For this year's celebration, Ann asked me to make a cassoulet. If you have never had cassoulet, it is a bean and meat stew with four components: beans, meat, stock, and a mixture of diced aromatic vegetables called mirepoix. If you look back to all my cassoulet posts, I tend to make them in February at the worst of the cold season for good reason. Cassoulet is arguably the greatest cold weather comfort food in the world. Thank you France for this wonderful celebratory concoction!

Prepping for Cassoulet

For the cassoulet that I would serve on Saturday night, I started the prep work early Friday morning, right after shoveling the overnight accumulation of snow, a pretty typical chore on a February morning. The day-before prep for cassoulet is pretty limited: soaking the beans overnight and making some delicious pork stock in which to cook the beans.

The first step in making stock is to roast your bones. For pork stock, I use pork neck bones that are both inexpensive and contain delicious meat. I am guessing that if they are readily available here in Central Oregon, you can find them just about anywhere. The trick with roasting bones is time. Put them on a lightly oiled sheet tray in the oven and roast them until they are golden brown on all sides, turning them as necessary. It's not a process that you can or should rush. Cassoulet is only as good as the stock that you cook the beans in.

Having turned the roasting pork neck bones on the sheet tray and put them back in the oven to continue browning and getting sexier and sexier, I was standing at my cutting board, my nose reveling in the porky goodness of the aroma emanating from the direction of the oven. I remarked to Ann, ensconced on the sofa by the fire and nose down in her phone, "How do think these beans are going to feel, being slowly cooked in all that porky goodness?" And she replied, "They're going to be the luckiest beans on earth!"

While the bones were roasting, I did some pre-prep on the vegetables for the mirepoix: onions, carrots, leeks, and celery. While I would dice the mirepoix vegetables on Saturday morning, I wanted the vegetable scraps today for flavoring the stock. To that end, I peeled the onion, trimmed the ends of the carrots, peeled off the tough outer leek leaves, and trimmed the leafy ends of the celery. Be sure to wash the leek leaves well; they can accumulate a lot of dirt, or worse, sand.

After the pork neck bones browned, I put them in a stock pot with all the peels, ends, and scraps of the mirepoix vegetables. Filled with water, the stock pot simmered gently for several hours before I separated the solids from the stock. The stock went into the refrigerator to congeal so that I could remove the fat from the top. After the solids cooled, I picked all the neck meat from the bones to put into the cassoulet on Saturday.

Last thing before going to bed Friday night, I put two pounds of beans in a bowl and covered them with a lot of salted water to soak overnight. I had been wrestling with the choice of beans for a few weeks. Two weeks prior, I put an order in to Rancho Gordo for a big box of beans including my two potential candidates for the cassoulet: Tarbais and Steuben Yellow Eye beans.

I have made many cassoulets in my life, about half with the traditional bean from from the Tarbes area in the far southwest of France up against the Pyrenees, the Tarbais bean; and about half with a traditional American bean called the Steuben Yellow Eye, purported to be the original bean in Boston baked beans. Heretofore, I have always slightly preferred the yellow-eyed beans.

Both beans are loved because while holding their shape, they become ultra creamy inside, exactly what you want for cassoulet, which is nothing if not a super peasant dish of pork and beans. After waffling for days on the choice, I decided to go with the original beans, the Tarbais. I was not disappointed; the resulting cassoulet could not have been better. And I still have Steubens to craft into some other delicacy!

Cassoulet Assembly


Would Anyone Manage to Get Here for Dinner?
Overnight Friday into Saturday morning saw a considerable amount of additional new snow and the forecast had it snowing all day. Both of the couples we invited live up big hills that the snow could make impassable, so during the day on Saturday we weren't sure if our party would come off or if we would be eating cassoulet by ourselves. Regardless of the weather, cassoulet is pretty much of an all-day affair and I needed to get started on it. After shoveling snow again, naturally.

The first item of business was to get the beans par-cooking. I drained them and placed them in a stock pot with fresh water and a bouquet garni of fresh rosemary, fresh thyme, and fresh sage. These herbs would impart a slight flavor to the beans while making the kitchen smell amazing for the 90 minutes in which the beans par-cooked.

In my past restaurant days, we had all kinds of meat garnishes for the cassoulet, especially after we butchered one of the hogs that we had a local farmer raise for us. In addition to pig's feet for the stock, we had a lot of trimmings from which I would make traditional garlic sausages. And we would cure, roast, and confit the hog bellies which aged under their bath of congealed duck fat in the walk-in next to vast containers of confited Moulard duck legs. In short, our walk-in contained every kind of meat garnish a cassoulet cook could want.

But now post-restaurant at home in a fairly small city a half a day's drive from anywhere, meats are limited to what I can get at the grocery store, especially because the farmers markets are inoperative at the height of winter; you know, snow and all. Having little alternative, I just decided to go with what I could scrounge at the store. I ended up buying a large tray of chicken thighs and a small tray of breakfast sausage links to use along with all the neck meat that I picked from the stock bones.

While the beans were par-cooking, I browned the chicken and sausages in fat I had saved in the refrigerator from my last couple of batches of chicken confit. And while the meats were browning, I diced all the vegetables I pre-prepped yesterday into mirepoix. This finely diced mix of carrots, onions, leeks, and celery, I cooked in the same pan in which I browned the meats, scraping hard to get all the brown meat bits into the vegetables.

While the mirepoix was cooking, I minced and added an entire head of garlic to give a nice garlicky background note to the cassoulet. The reason for so much garlic is because I would typically have made the dish with a garlic sausage instead of the mild breakfast sausage that I used for this cassoulet.

Once the beans were par-cooked, tender but still a bit crunchy, I drained and mixed them with the mirepoix and then seasoned them to taste with salt. No longer working in the restaurant, I do not have a pan big enough to accommodate this amount of beans and meat, so I decided to use two pans. I put a quarter of the beans in each of the two pans and topped them with 4-5 bay leaves each. Then I split the pork neck meat, chicken thighs, and sausages between the two pans and covered them with the remaining beans.

At this point, I should mention the one cheffy thing about this cassoulet. From time to time, I make chicken confit, that is, chicken cured overnight in a salt and herb mix, then rinsed and slowly poached while submerged under olive oil. Then this chicken gets refrigerated submerged under the fat, which congeals and protects it from spoilage.

After the chicken is all consumed, I melt the remaining fat and pour it into a container to keep in the refrigerator where the fat congeals on top of any juices from the chicken. I reuse the fat for the next batch of confit, but the intensely flavored juices go into a soup or stew. For this cassoulet, I browned the meats and cooked the mirepoix in some of this confit fat and I added the congealed juices (a half cup) to the cassoulet along with the pork neck stock.

After removing the layer of fat from the stock that I made on Friday, I warmed it briefly to liquefy it. Into each casserole, I poured enough stock to cover the beans by a good centimeter and put them in a slow (300F) oven to start the process of becoming insanely good. I checked the beans periodically to make sure they had enough liquid. Each time a crust would form on top of the beans, I would mash it back down into the stock, topping off the stock if necessary.

This process of crusting and breaking the crust and re-crusting over hours is essential to cassoulet. I want to say that the beans cooked slowly for about seven hours and I probably broke the crust four to five times during my forays from the fireside into the kitchen.

While this is a good description of the process of making a cassoulet, a more exact recipe follows just below.

Cassoulet in the Oven
Essential to Let it Crust and Re-crust over Several Hours
Cassoulet Cooling after Seven Hours in Oven

February Cassoulet Recipe


This is a cassoulet, beans aside, that you can make from stock items at the grocery store. In fact, despite the lack of duck confit and other great ingredients, the is the single best cassoulet I have ever made. In other words, don't let lack of ingredients deter you from making a cassoulet. As for the beans, great beans are easily available via mail-order from Rancho Gordo (note that they call them Cassoulet Beans, rather than the Tarbais beans that they are).

This recipe is based on two pounds or a kilo of beans, enough to feed 8-10 hungry people. You'll want to attack a cassoulet over two days, the first given to making the stock and soaking the beans, and the second to cooking the cassoulet itself.

Pork Stock


This stock is made from inexpensive pork neck bones plus the trimmings from all the vegetables that you will use in the cassoulet. If you have a choice, try to select the meatier bones; the meat will go into the cassoulet. This recipe makes a good gallon/4 quarts/4 liters of stock, enough for two pounds or a kilogram of beans.

oil to coat a sheet tray
5 pounds pork neck bones
5 quarts/liters water
tough outer leaves from one large leek, washed well
ends and trimmings from 3 medium carrots
peel of one medium onion
hearts and leafy ends of one bunch celery

Coat a sheet tray with oil and spread the bones out in a single layer on the tray, then place in a moderate to hot oven. Roast until the upper surface is golden brown then rotate the bones to brown another surface. Continue in this fashion until the bones are brown on all sides.

Remove the bones from the sheet tray to a stock pot. Pour enough water onto the hot sheet tray to cover it. With a scraper or spatula, deglaze all the brown bits from the bottom of the sheet tray and pour into the stock pot. Repeat as necessary to get all the brown bits into the stock pot.

Add the remaining water and vegetables to the stock pot and bring to a simmer for a minimum of two hours. I cooked mine for four hours. At the restaurant, we kept stock pots going all the time.

Strain the solids from the stock. When the stock cools, refrigerate it overnight so that any fat in the stock congeals and can be removed easily from the top of the stock. When the solids cool, pick all the meat from the bones and save for the cassoulet.

Cassoulet


This makes a large quantity of beans, enough to feed 8-10 people. Make sure that you have a deep pan or casserole large enough to hold the beans and all the meats. Or use two, as I did. No longer do I work in a restaurant where we had a braiser (called by its French name rondeau) large enough to hold 5kg of beans! When browning the meats, take your time and do it correctly. This is a key step in building flavor.

2 pounds/1 kilogram of Tarbais or other white beans, soaked overnight in salted water
bouquet garni of 1 large sprig each of fresh sage, fresh thyme, and fresh rosemary
1/2 cup oil/lard/duck fat for browning meats
10 chicken thighs, bone-in and skin-on, 5-6 pounds
1 12-ounce tray breakfast sausages
reserved pork neck meat from stock recipe above
1 large leek, in small dice
3 medium carrots, in small dice
2 large stalks celery, in small dice
1 medium yellow onion, in small dice
1 head of garlic, minced
10 bay leaves
salt to taste
1 gallon/4 liters pork stock from recipe above

Drain the beans and cook them in fresh water with the bouquet garni (the fresh herbs, tied together with a string) until tender, but not cooked all the way through. This will take about 90 minutes give or take.

While the beans are cooking, brown the chicken and the sausage thoroughly on all sides. Remove the meats to a platter while you cook the vegetables.

When the meats are browned, in the same pan, add the vegetables and garlic and cook gently until the vegetables are soft and the onions are translucent. Scrape the bottom well to incorporate all the brown bits from the meats into the vegetables.

When the beans are cooked, drain them and mix them with the cooked mirepoix. Season to taste with salt.

Place half the beans in the bottom of your casserole (or a quarter of the beans, if you are using two pans like me).

Give the beans a sprinkle of salt (there's no salt in the chicken, pork neck meat, or stock) and spread the bay leaves on top of the beans.

Next spread the meats over the beans and then top everything with the remaining beans and a final sprinkle of salt.

Pour the defatted, melted stock over the beans to cover by a centimeter or so.

Place the cassoulet uncovered in a slow oven (say 300F) and let it cook slowly. Mine was in the oven for seven hours, so you should get it cooking in the morning to eat at dinner time.

Keep an eye on the cassoulet from time to time. Cassoulet needs to crust, have the crust mixed back into the broth, and re-crust several times. Keep an eye on the stock level and add more as needed. I believe that I broke my crust four times during seven hours and added a bit more stock twice.

The Rest of Our Celebratory Dinner


Cassoulet in the oven, my thoughts turned to an appetizer, something easy and delicious for a cold winter day. We just recently got an order of pantry items in from Amazon (here in Central Oregon, access to less common grocery items is extremely limited), including a tin of fennel pollen, a couple liters of Sherry vinegar, and a couple jars of Calabrian chile paste. Yes, Virginia, these are stock items in a retired chef's pantry and spice drawer.

With these items in mind, I started building the menu. For the Calabrian chiles, Ann had been talking about spicy honey for days and I spent some time musing on what would taste really good with that sweet and spicy sauce. In fairly short order, I came up with using the sauce on some fennel-spiced meatballs that our guests could graze on before dinner. Who doesn't like a good meatball?

I wanted to keep the meatballs fairly plain to let the Calabrian chile honey be the star of the show, but I did want to incorporate the fennel pollen that had just arrived at the house. The seasoning of the meatballs, made from ground pork, is simple: salt, dried basil, fennel pollen, garlic, and red wine. I mixed this all up in the afternoon and fried a quick test piece to check the seasoning. After adjusting the seasoning to our liking, into the refrigerator went the meatball mix to sit and infuse the seasoning throughout the meat.

After washing up from the meatballs, I made a quick salad dressing for the pound of baby arugula that I had brought home for the store, which is where the Sherry vinegar comes in. I started with one part of sherry vinegar and two parts oil (a splash of French hazelnut oil and the rest extra virgin olive oil) and tweaked it to taste with salt and agave nectar. When I was happy with the taste and acid balance of the dressing, I added a finely minced shallot to the dressing and left it on the counter to be mixed with arugula and thin slivers of pecorino at dinner time.

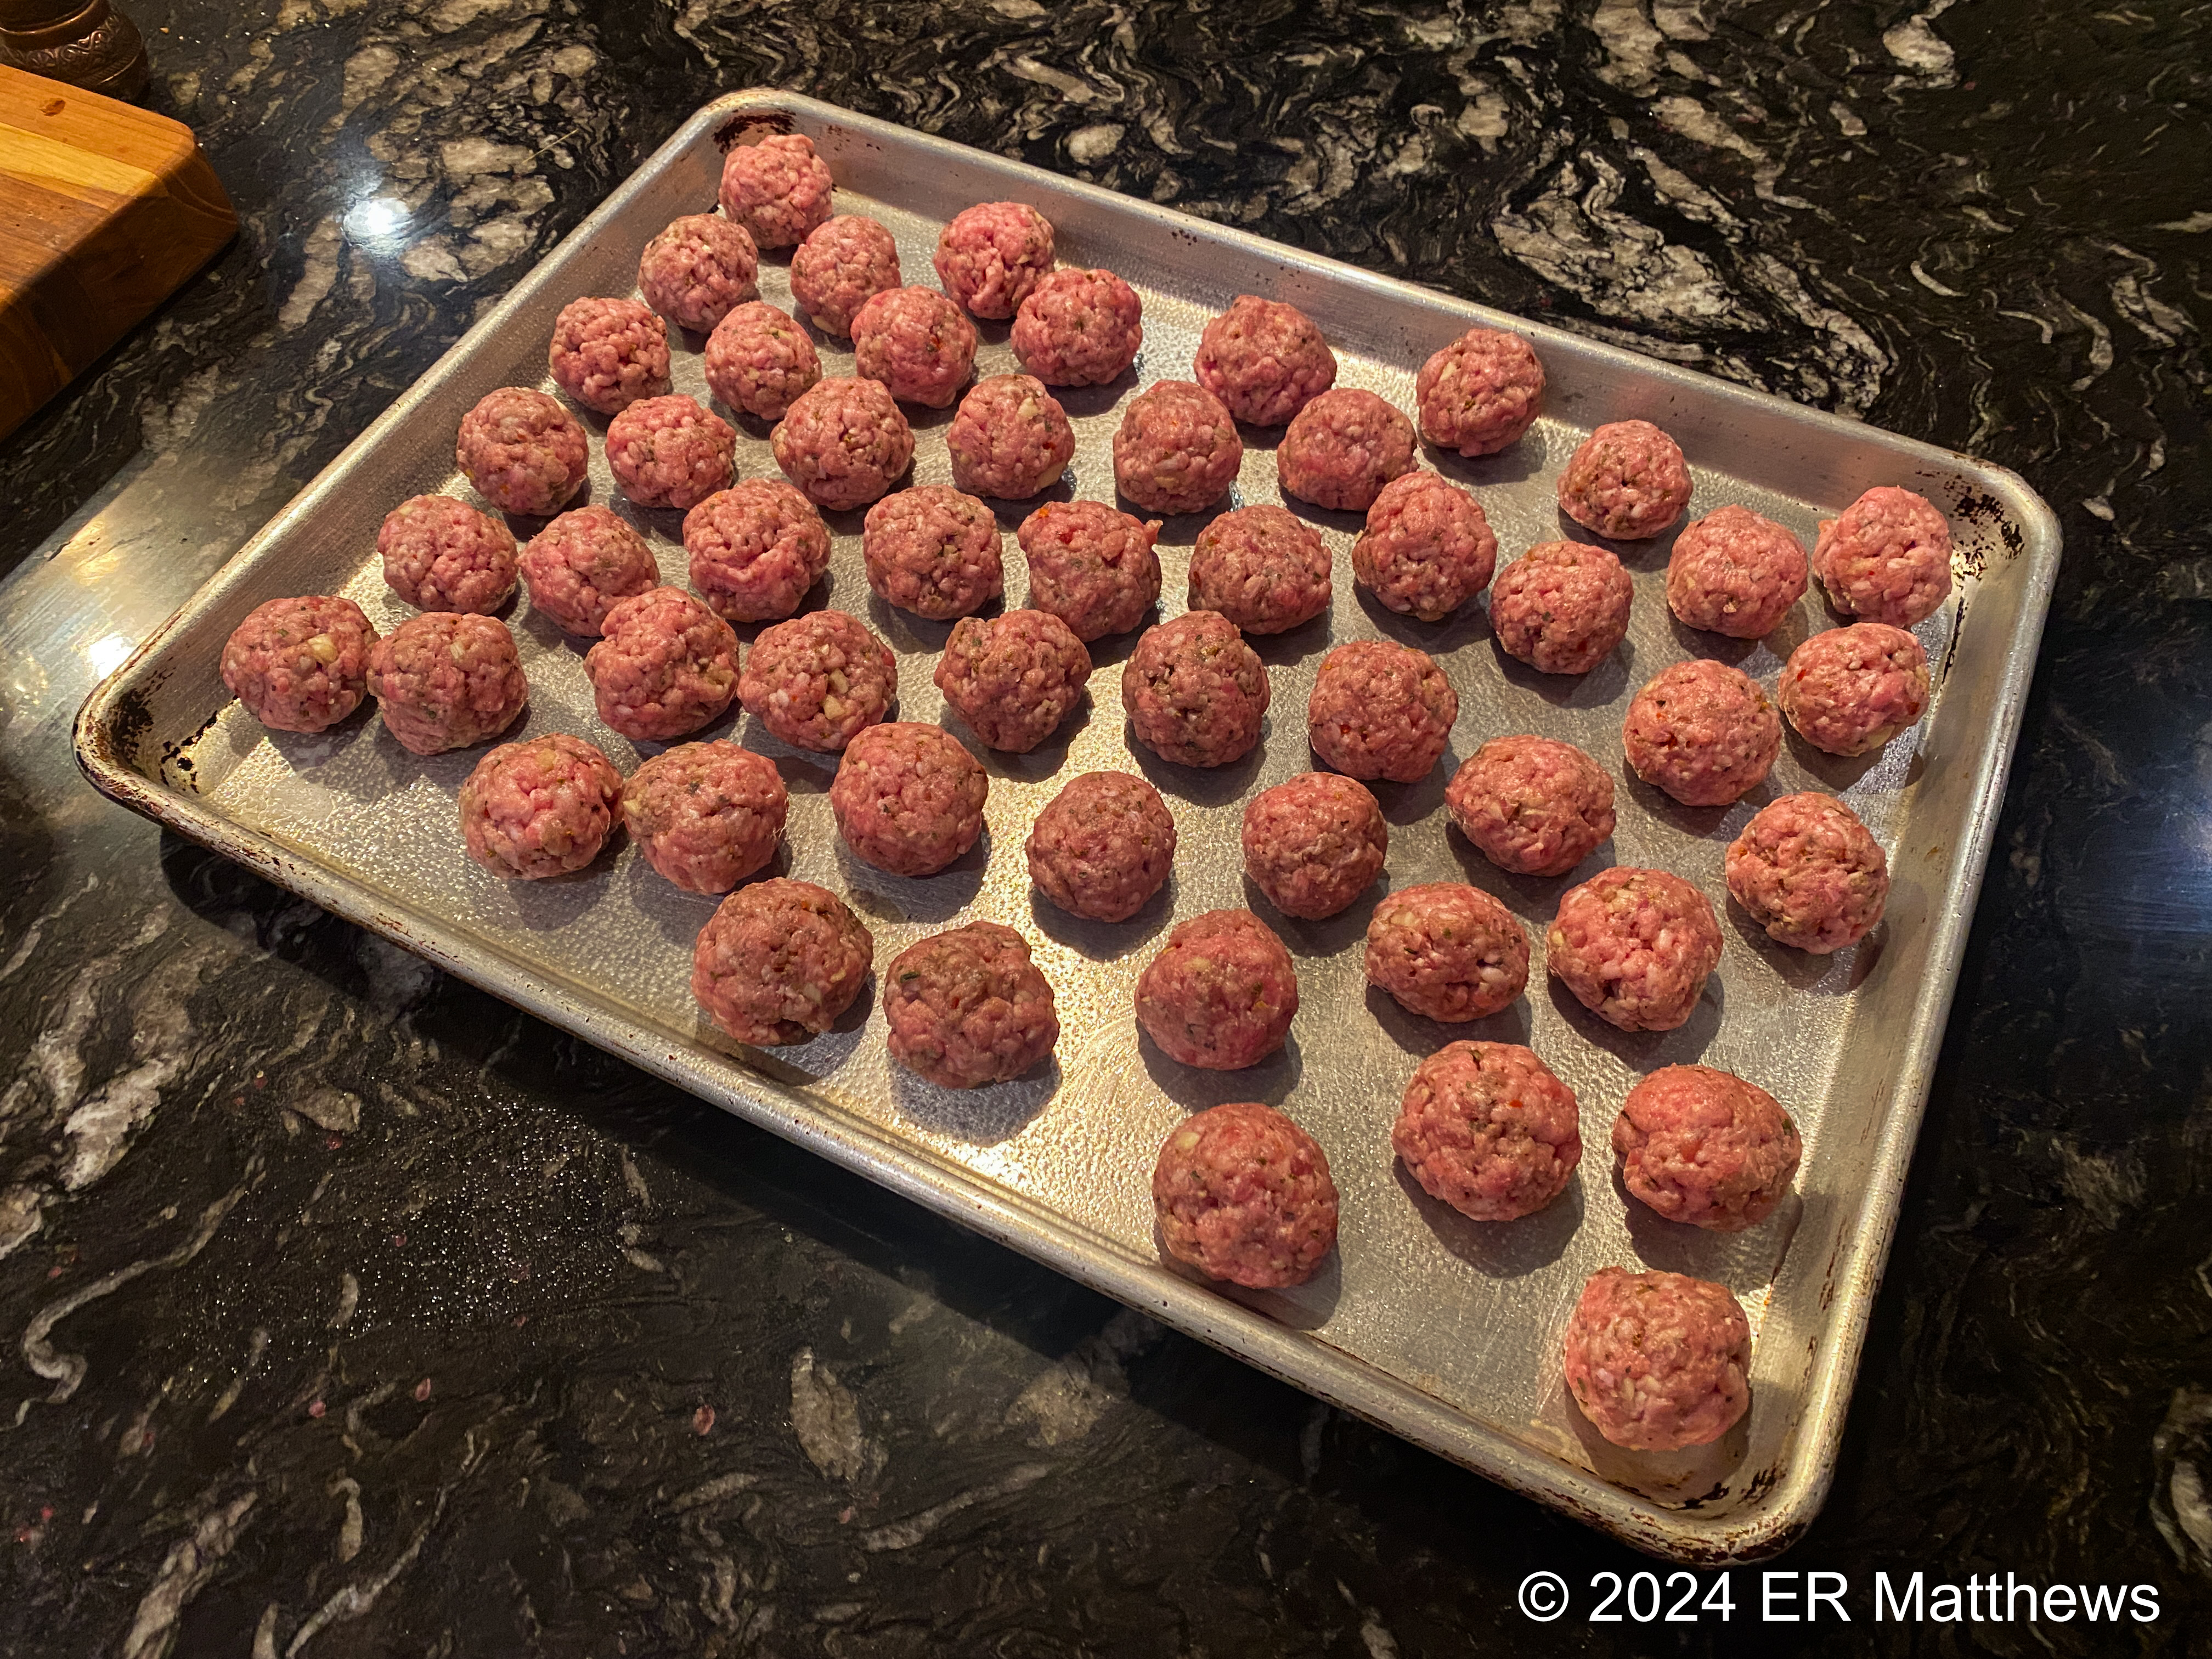
About a half an hour before our guests were to arrive (still no weather cancellations at this point!), Ann and I rolled the 2-1/2 pounds of meatball mix into small 1" (2.5cm) balls. For ease of cooking, I decided to bake them rather than fry or braise them. The meatballs went in the bottom of the oven under the still cooking cassoulet, which I topped with a bit more stock.

Fennel Pollen Meatballs Ready to Bake
When the meatballs came out of the oven 20 minutes later, I sprinkled them with flaky salt and more fennel pollen, then transferred them to a bowl for serving while Ann made final tweaks to the table, glassware, and so forth. I decided to serve the Calabrian chile honey on the side in case one or more of our guests was not a fan.

Fennel Pollen Meatballs, Calabrian Chile Honey
Just about the time appointed time for our guests to arrive (and knowing full well that the trip to our house would be slow on account of the still pouring snow), Ann cracked a bottle of wine for us to start pre-gaming it . While she was doing this, I went outside to remove the 2.5 inches of snow that had fallen in the the last hour from the sidewalk and to try to clear some space at the curb so that car doors could open without getting stuck in snow mounds.

Cassoulet Wine Pairings 


You've heard the saying, "What grows together, goes together"? It's a philosophy that I have always ascribed to in wine pairings. In other words, a good rule of thumb in wine pairing would be to go with the wine from the area from which the dish originates (when possible).

Living in Oregon, our wine coolers are stuffed with our local wine (Pinot Noir) and are sadly bereft of wines from Southwestern France where cassoulet originates. Unfortunately, these relatively obscure French wines are hard enough to source in major metropolitan areas and pretty much impossible to find out here in the boonies. But still, while Ann was out at her exercise class in the morning, I asked her if she would go by the store near her studio and pick up some French wine for dinner.

Cassoulet is a hearty dish that can pair with a wide variety of reds, anywhere from a light Gamay to a heavy Cabernet. My preference is to match the weight of the dish and the wine, opting for heavier rather than lighter wines. For heavier wines, I really like Cahors (Malbec) or Madiran (Tannat), both sturdy reds, with cassoulet.

Knowing the likelihood of finding such a wine was about nil, plan B was to have Ann grab some southern Rhônes, which are what we call GSMs, being made from any combination of the grapes Grenache, Syrah, and Mourvèdre. She came home with three wines, a Châteauneuf du Pape, a Lirac, and a Gigondas. All were delicious. Alternatively, we could have opened some of our GSMs from Walla Walla and the Rocks District from just north of us along the Columbia River.

Three Southern Rhône Reds for Dinner

Celebrating February


I am afraid that I was so intent on our guests that I forgot to take pictures. Rob and Dyce, sorry! What few I did manage are below.

Pre-Gaming it in Front of the Fire
Ann's Simple Tablescape
with Valentine's Gift Boxes for Guests
Andreas and Michelle
Cassoulet and Arugula Salad
Another cassoulet, my best ever, is in the books. I'm so thankful to have great friends with whom to share it.

Wednesday, November 1, 2023

Paella Party

Ann had wanted me to make a paella for her 60th birthday, but we just could not get large enough group together for such an event at that time. We instead went to Walla Walla wine country to celebrate her birthday and postponed the paella party until the end of October. My large paellera makes enough rice to feed a good 16 people, so it's overkill to make a paella for a small group. Besides, more people is more fun.

Paella Mixta
At its heart, paella is very simple: short-grained rice cooked in broth in a wide, open pan. And thus it depends primarily on two things: the quality of the rice and the quality of the stock used in cooking that rice. I started the day before in making a couple gallons of stock in our big stock pot. For paella, I make stock that complements the garnishes in the paella. So, for example, if I am making a traditional Valencian rabbit paella, I would use rabbit stock. In this case, I wanted to make a paella mixta with chicken, chorizo, and shrimp, so I made a mixed stock.

Starting the Stock; Eight Hours Yet to Cook
In my restaurant days, we would have lots of things laying around for making stock (and sometimes purposefully intended for stock). At home, I start by raiding my freezer in which I collect various bits intended for later use. In this case, I found a whole pork upper shank that I had been saving as well as a bag of trim from frenching a pork rack. Whenever I french a rack by totally denuding the rib bones for presentation purposes, the trim either ends up ground for sausage or other charcuterie or it ends up in the stock pot.

To the pork hock and the rib trim, I added a bunch of pork neck bones, sliced pig's feet, chicken wing tips (from prepping the chicken wings for the paella), shrimp shells (from prepping the shrimp for the paella), a bundle of parsley stems, carrots, celery, saffron, and garlic cloves and peels. Then I added a quart each of chicken stock and clam juice and topped the pot off with water and onto the stove it went to gently simmer for about eight hours, until the giant pork hock was fully cook and fall-apart tender.

When the stock was done, I separated the solids from the broth, mainly in an effort to get the stock as cool as possible as quickly as possible. Nobody wants a foodborne illness from warm stock sitting around growing bacteria. I lightly salted the stock before putting it away. When making paella, I find it easier to control the salt by pre-salting the stock lightly (it will reduce and concentrate the salt) than by trying to guess how much salt to add to the paellera.

At the point when I could bear to put my hands on the hot solids, I picked and reserved all the useable meat. Truth be told, I made more stock than I needed to have leftovers for a great pot of soup, which I did in fact make later in the weekend using the leftover pork meat. You can almost never have too much stock on hand and if you do, you can always cook it down to glace or demiglace and freeze it.

Appetizers: Meatballs in Romesco, Marcona Almonds, and Olives
Despite there being enough paella to feed a small army, Ann and I thought that we should provide some appetizers for our guests that they could munch while I was outside on the patio cooking. The morning of the paella, I made a batch of pork meatballs (pork, parsley, garlic, oregano, basil, and red wine) and that afternoon, I braised them in a big batch of romesco (roasted red peppers, garlic, almonds, white bread, sherry vinegar, and olive oil). These we set out with Marcona almonds (the best!) and some green olives. Simple, but tasty.

Paella Mise en Place from lower left: Vegetables (Piquillos, Onion, Poblano),
Rice, Olive Oil, Chicken Wings, Lima Beans, Shrimp, Salt, Diced Hard Chorizo,
Mix of Parsley/Garlic, and Mix of Pimentón/Saffron
Just before our guests arrived, I lit the fire outside and put out my mise en place for the paella with no fear of lack of refrigeration: it was only about 40 degrees outside and the sun was sinking fast. It would be in the low 20s by morning. The ingredients that I use in my paella vary each time and are certainly non-traditional. I started by learning how to make traditional paella valenciana and now I make my own to suit my mood. I feel lucky not to be bound by the strictures of custom and family pressure to make paella just so.

Preheating the Paellera
Everyone who saw my steel paellera (I love this 55cm Pata Negra from Garcima in Spain) heating on the fire pit on our patio mentioned how perfectly the pan fit on the fire pit. Actually, it was the other way around. I have never cooked a paella on gas before, always lighting a wood fire in the back yard. In our new home in Bend, we have no back yard or really any yard (a plus for travelling), just a patio in the courtyard of our house. And lighting a real fire on our patio wouldn't be all that awesome: we get enough smoke in the house during wildfire season. So, we actually measured the tripod on which the paellera stands and bought a round fire pit that would accommodate it. How is that for planning?

I'm going to say now that I did not make my best paella over the gas. I need more practice to get the perfect soccarat, the crust on the bottom, which I scorched a bit this time. Counterintuitively, I feel like I had better control using a wood fire that I could adjust by moving wood in or out as necessary. I will say that the wind guard around the fire pit really helped with a more even flame. Although I did have to rotate the paellera a bit during cooking, I didn't have to be constantly fiddling with it as I have in the past over a wood fire with an uncontrolled breeze.

Step 1: Brown the Chicken Wings
Steps 2 and 3: Sauté the Vegetables, Then Add the
Pimentón, Saffron, Garlic, and Parsley
Step 4: Add the Stock and Bring to a Mild Boil
Step 5: Add the Rice
Step 6: Add the Shrimp and Lima Beans
Here, you see the cooking paella with all its garnishes (notice how low the flame is now compared to the previous photos), the last to go on the dish are the garnishes that take the least amount of time to cook, the shrimp and the butterbeans/lima beans. The beans are a nod to traditional paella valenciana to which many would add a white bean called the garrofó, or another white bean, or even flat green beans that resemble our romano beans. I'm pretty sure that a traditionalist would cast an evil eye upon these alien beans while silently acknowledging that they taste pretty good in a paella.

Artsy Shot: Flames Glowing Beneath the Paellera

It was well and truly dark by the time the paella finished, at which point, we all migrated into the kitchen where I covered the paella with a towel and let it rest for ten minutes before serving. All eight of us (Ann and I, Rob and Dyce, Andreas and Michelle, and Mark and Kelly) gathered around the big island in the kitchen and dug in to the appetizers and the paella, with lots of red wine poured all around. To finish off the evening's meal, Rob made a delicious apple and green chile pie, with green chiles from Socorro NM that they purchased on their last trip to Santa Fe where they used to live prior to moving to Bend a year ago.

Rob Made This Outstanding New Mexican Apple-Green Chile Pie
Served with Vanilla Ice Cream
We had a great time. I only wish that I hadn't been so busy cooking because I would have liked to have been a bit more present with our guests and to have had the presence of mind to have taken people photographs. This post seems way more clinical than I had wanted for lack of photos of the socializing that took place all evening. Now that the paella is out of the way and it's too dark too early to make a paella until next spring, I'll revert to dishes that do not take active cooking so that I can relax and socialize.

Monday, April 26, 2021

Meatball Soup

Looking through the refrigerator on a cold March day, I spied a pound of ground turkey, two quarts of homemade chicken stock, and a bit each of baby spinach and arugula that was nearly shot. The cold weather definitely put me in a soup mood and for some reason, I thought to make the meatball soup that is commonly called Italian Wedding Soup here in the US.

Meatball Soup
This family of soups is not known by that name in Italy, however. It is often called zuppa di scarola (escarole soup, when made with escarole) or zuppa di verdure e polpettine (soup of greens and little meatballs). The English name comes from minestra maritata (married soup) from the marriage of the flavor of the greens and the meatballs, a happy union to be celebrated for sure! It's a great soup, but alas, has nothing to do with weddings.

I flavored my chicken stock with diced onions, leeks, celery, and carrots, poaching until just tender. Then I added the meatballs to the simmering stock for about 15 minutes. After poaching the meatballs in the soup, I added a little Mexican orzo-shaped pastina called semillas (seeds), the spinach, and arugula and let it simmer until the pasta was just done, another 8 or so minutes. All in all, this is a very quick and easy soup.

The Meatball Mix
The meatball mix could not be simpler, yet it is super flavorful, flavorful enough that Ann has asked me to make it over and over again as patties and as meatloaf. Many people would add grated cheese to their meatballs, but I was looking for a lower fat meatball, so I did not. To a pound of ground turkey, I added a bunch of finely chopped Italian parsley, four cloves of minced garlic, a teaspoon of dried basil, a teaspoon of Kosher salt, a pinch of pepperoncini (dried pepper flakes), and a slug of white wine.

Poaching the Meatballs

Saturday, September 5, 2020

Comfort Food

Wednesday August 26, 2020 was a shitty day, shitty even by the standards of 2020, the year that has redefined the term annus horribilis for most of us, perhaps Queen Elizabeth excepted. On Wednesday afternoon, at 91 years of age after years of health struggles, Ann's mother Mary Chiappetta died of natural causes in the ICU at Arlington Hospital Center in Virginia after a three-week stint on a respirator. Although we expected it, our inability because of COVID to travel from Oregon to be there with her made a bad experience so much more horrible for us, especially for Ann.

We feel grief at her loss, torment at not having been able to say goodbye at the end, and guilt born of not being there for her. Compounding these emotions is the question of how we can possibly in good conscience have a real funeral service to honor her life under these pandemic conditions. The adjective shitty that I used above does not even come close to capturing the depth and rawness of these emotions.

For comfort in horrible times, we turn as so many do to comfort food. Tears streaming down her face and between racking sobs, Ann implored me to cook her something comforting. After some discussion we arrived at pasta, a baked pasta with tiny meatballs. Ultimately, I think Ann was beyond caring what I made, but what is more comforting for a good Italian girl than pasta?

As I was going out the front door to the store to pick up groceries for the next ten days, including supplies for the pasta, Ann yelled after me, "Get beer!" "No shit!" I remember muttering to myself. And so in the fog of a stunned mood, I vaguely recall going to the store pretty much on autopilot to get ingredients: tomatoes, Italian parsley, ziti, ground pork, mozzarella, and ricotta.

Baked Ziti and Meatballs
I won't lie and deny that I bought some really good beer, a couple of craft hazy IPAs, and I also won't deny that cooking interrupted the beer drinking at times. It was just that kind of day. Through the fog of grief and beer, I managed somehow to take some passable photos. I also won't deny that writing this is my way of trying to process and come to grips with the hurt. Here's a quick primer on how to make a baked pasta with meatballs.

Meatball Spices
I've been through making meatballs several times on this blog, so just a refresher here. I always start by mixing the herbs and spices with the liquid ingredients so that they get evenly distributed in the the meat. For a pound of ground meat, I would use one egg, about a tablespoon each of basil and oregano, 3-4 garlic cloves, a teaspoon of Kosher salt, and a large pinch each of black pepper and red pepper flakes. To this, if I am doing restaurant-style meatballs, I'll add a half a cup of heavy cream, but at home, I use chicken stock instead.

Meatball Mix
After mixing the spices well into the liquid ingredients, in goes the meat, in this case ground pork, because pork makes awesome inexpensive meatballs. Veal is amazing, but who can afford it or even find it at the store? I don't care for beef meatballs and so I avoid beef and the so-called meatball mix of a third pork, veal, and beef. I made sure to break the meat apart gently before folding it with my hands into the liquid and spice mixture. Then I asked my trusty assistant to sprinkle in a handful of panko. As I mixed it in, I could feel that it wasn't enough to bind the mixture, so Ann added another handful.

I let the mixture stand for a few minutes before rolling it into small meatballs. This rest period gives the panko time to absorb the liquid and firm up the mixture.

Blender Marinara
While the meat mixture was resting, I made a batch of blender marinara, the easiest sauce ever. Into the blender, I dumped two 28-ounce cans of diced tomatoes in juice, two minced cloves of garlic, a tablespoon of dried basil, and a teaspoon of Kosher salt. Ten seconds of blending and presto!

We never kept marinara on hand at the restaurant, even though parents often ordered it for their kids. It was simple enough to whir it up in the blender on the fly and have it to the table nicely warm, but not screaming hot, within four minutes using par-cooked pasta.

I stressed to all my cooks that time was of the essence because no parent can relax with a hungry child at the table. I always sent the pasta out warm, not hot, so that the kids, who invariably shoved their hands right in the plate, would not burn themselves and so they could eat right away without fretting and fidgeting while their dinner cooled. Then mom and dad could relax over a glass of wine while we cooked their food.

If you will indulge me one more aside apropos of marinara, canned tomatoes is something I am really picky about. I will buy store brand or private label of some vegetables (artichokes, beans, chickpeas, etc.), but I will not risk my tomato-based dishes on generic tomatoes. I am brand loyal with tomatoes because I want consistent product in the can, each time that I open one. Sometimes that does not happen with packer tomatoes.

I want consistently ripe tomatoes without green pieces, cores, and skin, and with a consistent ratio of flesh to juice. Back east at home, I used Cento brand and out here, I have settled on S&W, a Del Monte brand. Yes, they cost more, but I won't risk my food for a few cents. It's not the brand name that matters to me; I care only that each time I open the can, I get the same product as every other can that I have opened.

Raw Meatballs Ready for Oven

Cooked Meatballs
Although you can fry meatballs before braising them in sauce, I'm fairly lazy and just put the raw meatballs into the sauce. These small meatballs took about an hour or so in a moderate oven to braise. Larger meatballs take longer. If you are uncertain about whether the meatballs are done, they should be at an internal temperature of 160F, 165F if they contain poultry.

Partially Cooked Pasta, Italian Parsley
Once the meatballs were done, I par-cooked two pounds of ziti to about two-thirds done, then mixed the drained pasta with fresh Italian parsley, the meatballs, about 3 cups of ricotta, and enough marinara (just shy of a quart, so about a quart leftover) to coat everything. After seasoning with salt and a bit more red pepper flakes, I put the mix into a baking dish and topped it with grated mozzarella.

Ziti Before Topping with Mozzarella

Baked Ziti
The oven was still going from baking the meatballs, so it didn't take too long to get a nice crust on the cheese, perhaps 35-40 minutes. After the baked pasta cooled for the better part of an hour, I sliced it into squares as you see in the very first picture above and we devoured it. For the sake of comfort, we ate far more of the pasta than we should have and drank more beer than we should have. But no regrets: what else to do on the shittiest day of 2020, the year that is proving to be the shittiest of our lives?

RIP Mary Chiappetta. You were sharp as a tack, funny, personable, frugal to a fault, direct, opinionated, not one to be on the wrong side of, and as big a fan of me as I was of you. I was privileged to be your son-in-law. In trying to find humor amidst the at times overwhelming sadness, I hope that wherever you are, there are no turkeys and baby goats on your bed. And may 2020 not become any more horrible.

Tuesday, March 31, 2015

Meatball Subs

Meatball Subs, Marinara for Dipping
Ann and I kicked around a few ideas about dinner early Sunday morning and very quickly, Ann decided she wanted meatball subs. Although we just had them recently, why not again? Meatballs make a great sandwich. Eating them is something of a mess what with all the marinara dripping out of the sandwich, so I made these a little drier and served a bowl of marinara on the side for dipping. Win!

These meatballs are ground pork shoulder with a bit of Salvadoran chorizo left from breakfast, mixed with olive oil, panko, basil, oregano, garlic, and salt. The meatballs go raw into a baking dish and I pour over a quick marinara made in the blender. They bake covered at 350F until they're done or we're ready to take them out, whichever comes first.

To assemble the sandwiches, split the bread and open it up. Brush the cut side with olive oil and sprinkle with salt and pepper. Broil until the cut side of the bread is brown; alternatively, grill the bread or cook on a griddle, whatever works to get the bread toasted. Lay in the meatballs, top with marinara and then with provolone and then run back under the broiler until the cheese melts. Try not to burn yourself on the first bite!

Writing this made me think of something I hadn't thought of in decades. I used to live on meatball subs in college at UVa, back in the day, at the now demolished university-run snack bar called the Glass Hat. I loved these subs then and I love them now.

Tuesday, December 16, 2014

Meatball Subs

When I make meatballs as I did on Sunday, I always make too many because I want leftovers to use in meatball subs. My hat is off to whomever invented the meatball sub. That person was a boss sandwich maker!
Awesome Meatball Sub
There is no place around here to get a good sandwich. Period. So I have to roll my own. If you have a good deli or sandwich shop near you, be thankful you do.

A good meatball sub is a thing of beauty. Because it is so simple, there is no place to hide. Bread, marinara, meatballs, cheese. That's it, so each ingredient has to be awesome. No green stuff. No green stuff ever.

Dinner last night was awesome!

Getting our Christmas on

Ann and I had a pretty great day Sunday, getting ready for Christmas. We planned to stay in, put up the tree, and cook, cook, cook. Aside from the few minutes I needed to run to the restaurant to pick up some meatball supplies, we stayed at home and got into the holiday spirit. Of course, a few mimosas to kick off the morning didn't hurt our spirits any.

The Christmas Cookie Elf

Mimosas to Get the Spirit Rolling
While Ann started getting her cookie things together in the morning, I mixed up some mimosas for us. We had a bottle of Conde de Subirats Cava in the fridge and while it wasn't all that awesome on its own, it made a great mimosa, the wine's abundant acidity cutting through the sweetness of the orange juice.

Smoked Sausage, Onion, Tomato, and Pesto Frittata
After I got back from erranding and while Ann was working on her cookies, I baked a smoked sausage, onion, tomato, and pesto frittata for our breakfast around 1pm. It was just the thing for a self-indulgent stay home meal, though neither Carter nor Ann liked the tomatoes in it. Note to self.

Making Chocolate Bark

Ricotta Christmas Cookies

Chocolate Covered Popcorn
Making cookies and putting up the fir tree consumed the afternoon. Along towards dark, I made meatballs. First thing in the morning, Ann decided she wanted spaghetti and meatballs with garlic bread. Well, at least it made deciding what to make for dinner easy, but it did require a trip into town to collect supplies. She knows I don't really care for spaghetti as a pasta cut: it is too thin for my liking. Fortunately, I have a small cache (now depleted) of perciatelli at the restaurant for emergencies like this.

Pork Meatballs Braised in Marinara
These meatballs are 100% ground pork shoulder with red wine, cream, pesto, parsley, panko, grated pecorino romano cheese, garlic, salt, pepper, and red pepper flakes. I like to make them about 3 ounces apiece because I want a meatball, not a scrawny little thing. The marinara is tomatoes, garlic, olive oil, basil, salt, and pepper, all blitzed up in the blender and poured over the meatballs. I cover the meatballs in marinara, wrap the whole thing in foil, and braise in a moderate oven for a couple hours. I am not a fan of browning meatballs before braising. Whatever it adds in flavor, I think it takes away in texture. My meatballs always have a soft, silky texture.

Perciatelli, Meatballs, Marinara, Garlic Bread
And here is our dinner complete with Ann's kick-ass garlic bread. She's a full-blooded Italian, so garlic is a basic vegetable at our house. No vampires need apply. I love her garlic bread! And, yes, yes, we know that meatballs and garlic bread are not appropriate garnishes for perciatelli with marinara. Did I mention that Ann is full-blooded Italian? You go ahead, taking your life into your own hands, and tell her how they eat pasta in the old country. Go ahead, I dare you!

Ode to the Tortilla

I love tortillas. It wasn't always that way. I am a child of the early 1960s. Then, on the East Coast, our food was influenced by two th...