Showing posts with label kitchen basics. Show all posts

Monday, November 27, 2023

Kitchen Basics: Crostini

If you serve a lot of appetizers as we do when entertaining, you're often looking for finger foods that don't require utensils to eat so that people can nosh and chat more easily. For us, this often means small bites on either crackers or crispy toasts that we call crostini. I prefer crostini to crackers and so I make them somewhat frequently. They take time, but they're easy enough to make and you can make them in advance and store them in a closed container for a few days. We made them by the hundreds at the restaurant using the technique in the photo-essay below. The timings mentioned are for an oven at 350F.

Crostini, Perfect for Appetizers
Slice a Great Baguette to a Thick 1/4", 6-7mm
Bias Cut Gives a More Interesting Shape
Lay on Sheet Tray and Drizzle with Olive Oil
Flip and Drizzle the Other Side
Sprinkle with Salt
Top with a Second Sheet Tray
This Keeps the Crostini from Warping
Flip After 15 Minutes in a 350F Oven
This Lets the Steam Out
Flip After 10 More Minutes
And Again After 10 More Minutes
After a Final 10 Minutes
Cool and Store in a Covered Container

Thursday, November 9, 2023

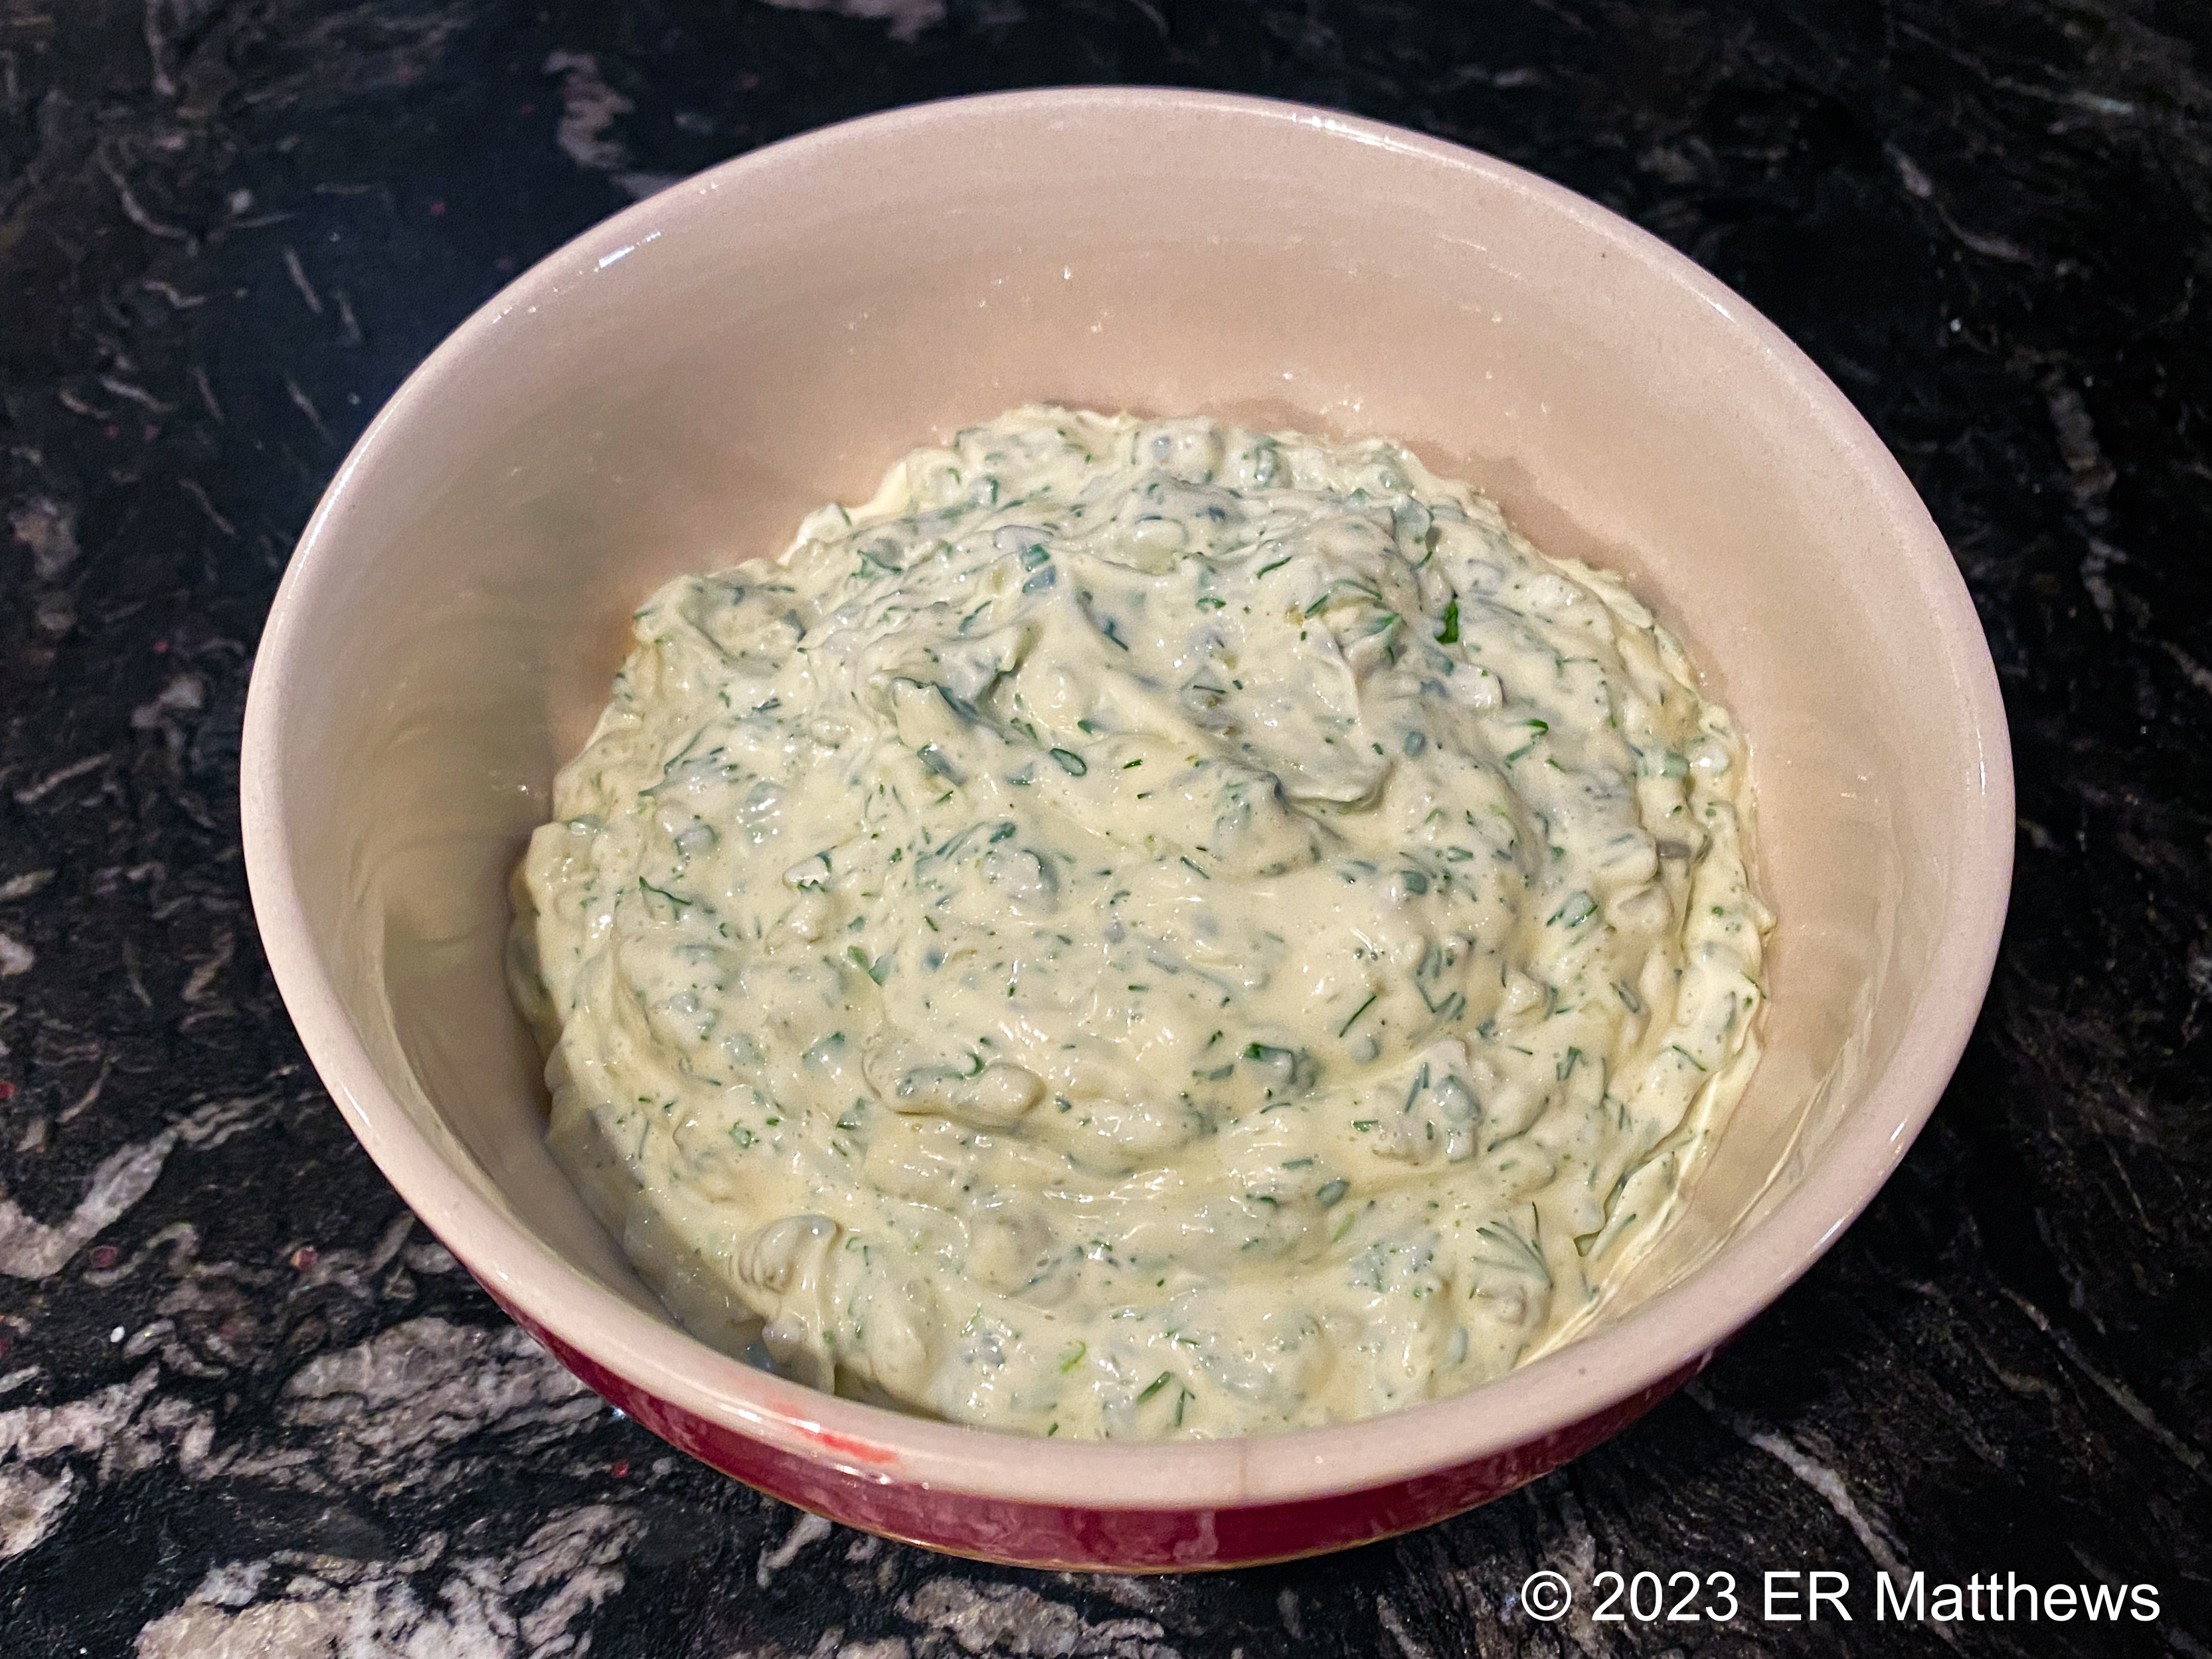
Kitchen Basics: Herb Mayonnaise (Sauce Tartare)

There are few sauces easier to make than the French classic sauce tartare, a sauce based on mayonnaise, for which reason I prefer to call it herb mayonnaise. And truth be told, this lets me add any damned herbs that I want without running afoul of those who claim that tartar sauce can only be made just so. It is a beautiful sauce for fish and seafood, chicken and poultry, and light white meats such as pork and veal.

Herb Mayonnaise (Sauce Tartare)
You'll find all kinds of recipes out there including any manner of ingredients. I prefer a pretty simple version myself using the classic fines herbes that I happen to have on hand. Which is to say, that although I have something of a recipe, each manifestation is different depending on the season and the ingredients that I happen to have.

Herb Mayonnaise Ingredients
Dill, Tarragon, Lemon, Cornichons, Chives, Mayo
The classic fines herbes are four: Italian (flat) parsley, tarragon, chives, and chervil. I seldom have chervil on hand (it's so hard to come by in the US that we used to grow it for our own use at the restaurant). I can hardly resist the temptation to add baby dill to this list if I happen to have it. I really think it adds another dimension to the other herbs, but you will almost never find this ingredient called for in classic recipes.

Although I love and use copious amounts of Italian parsley in my cooking, for the version of herb mayonnaise above, I omitted it, simply because I had so much dill, tarragon, and chives on hand that I wanted to use before they spoiled.

I aways add cornichons, finely minced, to the sauce and I will use the tiny non-pareil ("without equal") capers in brine if I happen to have them, but I do not right now in the food desert that is Central Oregon. I'm not a fan of the coarser salted capers for this sauce, but in a pinch, you can soak them well to remove some of the salt.

At home, I do not typically make the mayonnaise base as it is a lot of work for a small quantity of sauce. Of course at the restaurant when making liters of sauce at a time, making the mayonnaise is de rigueur. So at home, I typically start with commercial mayonnaise, about which I am ultra-picky. I, like most southerners and most chefs of my acquaintance, insist on Duke's. It's Duke's or bust for me.

To the mayonnaise, I add the finely minced herbs, cornichons, and capers. After mixing, I taste for three things: salt, piquancy, and acidity. Salt, you need to be careful with because both capers and cornichons are already salty. If I am using commercial mayo, I will almost always add a fair amount of lemon juice for acidity and a scant sprinkle or two of white pepper for piquancy (you cannot really taste the pepper, but it enhances all the other flavors). If I am using purpose-made mayo, I will have already added both the lemon juice and white pepper when whipping the mayo.

Herb mayo is best made in advance so that the herbs have time to infuse into the mayonnaise. I will typically make it in the morning for use in the evening, letting it mellow all day in the refrigerator. Like soup, sauce tartare is best the next day. But because it contains fresh herbs, you should only make it in the quantity that you will use within a day or perhaps two.

Other cooks, including many renowned French chefs that I admire, will add other ingredients, but those ingredients are not for me. They could include cayenne, mustard, hardboiled egg yolks, onion (yellow or green), or shallot. As I've said many times before on this blog, it's your dish and you are free and even encouraged to do it your way.

Wednesday, July 12, 2023

Kitchen Basics: Poaching Shrimp

It's summer now, even in Bend, Oregon where it last snowed on June 19th of this year, and our palates are turning towards cooler dishes and to raw ingredients. Last night, after waiting nearly a week for our avocados to ripen, I made a quick salad of fresh tomatoes, raw corn, diced avocados, and poached shrimp. I imagine this salad has been made millions of times; there's nothing special about it save for perhaps how I poach my shrimp.

Tomato, Corn, and Avocado Salad with Poached Shrimp
This is a perfect dish to illustrate poaching seafood using a court bouillon, a classic flavored and acidulated poaching liquid, one of the foundations of French seafood cookery.

Although I have specified a recipe below, at the end of the day, we're talking about a salad and salads are nothing if not fungible. That is, you should feel free to adjust this any way that you want. Want a higher proportion of tomatoes? Add them. Don't like cilantro? Maybe use Italian parsley. Don't have a red onion in the pantry? Use green ones instead. Want to add toasted macadamia nuts? Do it. Hopefully, you get the idea.

Tomato, Corn, and Avocado Salad with Poached Shrimp


1 dry pint of small salad tomatoes, halved or quartered depending on size
3 ears of sweet corn, kernels shaved off
4 medium or 2 large avocadoes, diced
1/4 of a medium red onion diced, about a 1/2 a cup
1/2 cup of cilantro leaves
1 pound of poached and cooled medium peeled shrimp
juice of one large lime
2 tablespoons salad oil (I used extra virgin)
salt to taste

Mix all ingredients. Taste and adjust seasoning. Serve immediately so that avocados do not brown. Serves two amply as a main course or four to six people for an appetizer. This would also make a great filling for lettuce wraps.

Poaching Shrimp in Court Bouillon


I call for a sachet for the spices in the court bouillon so that you don't have to pick the spices out of the shrimp before you use them in your salad. You are, of course, welcome to pick them out but don't blame me if you get grumpy about it.

2 quarts of water
1/4 cup of rice vinegar
2 tablespoons Kosher salt
1/2 teaspoon black pepper
1 cheesecloth sachet containing:
1 clove garlic, sliced
1 teaspoon coriander seeds
1 teaspoon allspice berries
1/2 teaspoon brown or yellow mustard seeds
pinch crushed red pepper flakes

Bring all the ingredients to a slight boil and let them cook for 5-10 minutes to really flavor the court bouillon. Raise the heat to a rolling boil and add the shrimp. When the court bouillon comes back to the boil, turn off the heat and walk away. After 15 minutes or so, the shrimp will be cooked and more importantly, will have picked up a bit of the flavorings.

You can use the shrimp warm, allow them to cool in the broth to room temperature, or drain them and refrigerate for later use cold. Me, I like to cool them to room temperature in the court bouillon and add to the other room temperature ingredients in my salad.

Saturday, May 14, 2022

Kitchen Basics: Beurre Noisette/Brown Butter

Beurre Noisette/Brown Butter
Brown butter, or as I learned it beurre noisette (literally "hazelnut butter" after the color), is endlessly useful for its inimitable nutty flavor. You can drizzle it over cooked vegetables, fish, or poultry for flavor. You can replace melted butter in waffles and pancakes with it. You can cook things in it, such as eggs or glazed carrots. You can use it as the base for a sauce, perhaps by adding a squeeze of lemon juice or a bit of fresh sage. You can even make phenomenal ice cream from it.

It is merely butter cooked at moderate heat until the residual water in the butter evaporates (you'll hear it stop spitting when the water is gone) and the milk solids brown. You should skim the foam off the top as it cooks and make sure to take it off the heat a bit early as the solids will continue to cook and potentially burn otherwise.

Wednesday, May 11, 2022

Kitchen Basics: Garlic Confit

To get tender whole cloves of mild garlic to add to dishes, you can roast them, blanch them, deep fry them, and my favorite way: confit them. The French verb confire means to preserve. Originally, confiture meant fruit preserved by poaching slowly in sugar syrup. Over time and by extension, it has come to refer to meat and other non-fruit items preserved by gentle poaching in fat. The resulting confit is stored away from oxygen under fat and if it is cured with salt before being cooked, it will last a very long time without spoiling. Now of course, we all have refrigerators and we no longer confit meat to preserve it, but because we are in love with its flavor and texture.

Peeling Garlic
Garlic (rear pan) Under Olive Oil, Ready for the Oven
Garlic (rear pan) Confitted for Two Hours

I hate to even call this a recipe for garlic confit, because there really is no recipe. After peeling the garlic (the annoying, but necessary part), place it in an ovenproof container and cover it in fat. At the restaurant, we would have used duck fat from the very many ducks that we processed weekly. At home, however, I used olive oil, extra virgin at that. There is no need to use extra virgin olive oil for confit, but I wanted to be able to use the resulting garlic-flavored oil to season future dishes.

The idea is to poach slowly, so I set my oven at 250 degrees, very slow. Cook until the garlic is soft, but still holds together, about two hours.

Friday, February 26, 2021

Kitchen Basics: Spaetzle

Making spätzle is something that I wager most Americans don't have any idea about doing. But they should, because spätzle is a delicious starch that you can make in minutes without having to take a trip to the grocery store using ingredients already on hand.

Spätzle are fine dumplings made from a dead simple batter extruded through small openings into boiling water. They cook in seconds. In short, nothing could be easier.

For years, I had seen references spätzle that implied that you needed a special tool, a spätzle maker, to make them. But when I thought about it, I decided that I had enough tools on hand already, that I did not need to add yet another specialized tool to my arsenal, just to make spätzle. You can see below that I repurposed my potato ricer for the job.

Ditto for the restaurant. It seems that during the winter, we pretty much made spätzle daily. And we never counted a spätzle maker in our inventory. We always put a perforated bottom hotel pan over a pot of boiling water and used a bench knife to force the batter through into the water.

If you don't already have something you can repurpose at home, don't fear. Spätzle makers are inexpensive.

Spätzle Batter Ready to Cook

Spätzle Batter


The batter for spätzle could not be any simpler. The following recipe is based on a cup of flour, which will make enough spätzle to feed two people amply.

2 large eggs
1/4 cup milk
1/2 teaspoon Kosher salt
1 cup all purpose flour

Beat the eggs well, then add the milk and salt and whisk together. Add the flour and whisk until smooth.

This is the basic formula for unflavored spätzle. You can scale it up pretty easily. Just watch the salt as you make a larger and larger batch. We always seasoned it to taste at the restaurant.

One thing to note is that once you start making spätzle, you might find that you want the batter thinner or thicker to work better with your equipment. Add milk by dribbles to thin and flour by teaspoons to thicken as needed.

Many recipes call for flavoring the spätzle. A few grinds of fresh nutmeg are traditional. I've made them with all kinds of flavorings including fresh dill and lemon zest. Once for a hoisin-glazed duck leg and rare grilled duck breast, I did spätzle flavored with orange zest and five spice powder. The sky is the limit as far as flavorings go.

Loading Batter in my Ricer
Spätzle Cooking; Ready to Remove
Drained and Transferred to an Oiled Sheet Tray
The cooking process is easy. Put a small quantity of batter in your maker. Over gently boiling salted water, extrude short dumplings into the water. You may need to slice them off the bottom of the extruder with a knife to get them to drop into the water, but if the batter is thin enough, they should drop in on their own.

When the dumplings float, they are ready to remove from the water. They will float in seconds. You may need to stir them gently if they want to stick to the bottom of the pan. Scoop the dumplings out, draining them well, and put them on an oiled sheet tray. Continue until you use all your batter.

You can make spätzle the day before, but unless you store them spread out on a sheet tray as above, they will stick together unless you toss them in oil. In general, they are best fresh. At the restaurant, we would make them in the late afternoon and leave them on sheet trays to dry a bit. Any leftovers at the end of service went into staff meals.

Wednesday, February 24, 2021

Kitchen Basics: Prepping Pearl Onions

Although pearl onions are not common in home cooking, we used a lot of them at the restaurant. They are perfectly sized for great restaurant presentations in which you can leave them whole for aesthetic reasons.

To do this requires that you peel them and if you don't know a simple trick, they can be a bear to peel. There's a reason why a lot of produce houses have custom cut divisions that supply already peeled pearl onions in large quantities. They can be labor intensive.

Slice off the Root End
Boil for Two Minutes
Squeeze from the Stem End
Slice off the root end of each little onion. Put the onions in boiling water for two minutes. Remove and cool them to the point where you can handle them. Squeeze from the stem end and the onion will pop right out of its skin. You may need or want to trim the stem end a bit.

Saturday, January 16, 2021

Kitchen Basics: Making Baked Tostadas

If you have time, making tostadas at home is way more economical than buying them at the store. All it takes is two sheet trays, corn tortillas, and time. You can also make tostadas by frying the tortillas in oil (and they are crazy good), but that's not super healthy eating, is it? Baking the tostadas removes fat from the equation and yields a very good result.

Raw Tortillas on a Sheet Tray
For every two half sheet trays, you can make 8 tostadas, plenty for two people. Lay out the tortillas as you see in the photo above, with three tortillas down each side of the pan and the other two tortillas in the middle, overlapping those on the edges.

Keep the Tortillas Flat
Keep the tortillas flat during cooking by covering them with another sheet tray.

First Turn at 15 Minutes
Place in moderate oven (350F) for fifteen minutes. Remove and flip all the tortillas. This will give the water vapor a chance to evaporate and help dry the tostadas. Notice that the tortillas have shrunk to the point where there is almost no overlap.

Second Turn at 30 Minutes
Return the covered tortillas to the oven for another fifteen minutes. Then remove them and flip them once again. You'll be able to judge how dry they are at this point and make an estimate of how much longer they need to cook. I notice timing differences if I am using the bottom shelf (near the flame) or the top shelf (away from the flame). How fresh the tortillas are (how much water they contain) also influences cook time as well as how full the oven is. It takes longer if I am also cooking another tray of tostadas or something else simultaneously.

Finished and Cooling at 37-40 Minutes
Once the tortillas are done to the point where they are crisp without being burnt, pull them out and uncover them to let them finish evaporating any remaining water while they cool. Once they have cooled to room temperature, you can store them for very long periods in a tightly sealed container. Humidity is the bane of tostadas, so keep them well-sealed if you are not going to eat them in short order.

Sunday, December 20, 2020

Kitchen Basics: Making Tamarind Water

Tamarind is a wonderful culinary tool, tasting a good bit like lemon, but a little darker and fruitier. While tamarind is not commonly used in the US, it is really popular in a lot of other places, often as a substitute for citrus and used as a souring agent. In India, tamarind makes a great chutney and is commonly used in cooked dishes all over the south. In Mexico, tamarind makes a wonderful agua fresco, very similar to lemonade. Here in Oregon, you seem to be able to get a bottle of tamarindo at any taco shop or truck.

But I mainly use it to create the national dish of Thailand, pad thai, in which tamarind is a key component of the sauce for the noodles.

Tamarind comes in several forms: as whole pods, in bricks of pulp and seeds, and as a purée. If you have (and likely overpaid for) tamarind purée, you're all set. If you have pods or a brick of pulp, follow the steps below to make tamarind water, which is what you'll need for pad Thai, tamarind chutney, or to flavor a curry.

A Whole Tamarind Pod
What we call tamarind is the seed pod of a leguminous tree with African heritage. If it looks to you like the seed pod of an acacia or pseudoacacia, you're right. They're in the same family. Covered by a suede-like peel, the flesh is sticky and contains large seeds. It is the flesh that we use to make tamarind water.

I'm not sure what conditions are like where you are, but out here in Oregon with our large population of people of Mexican heritage, you can find tamarind pods in many large groceries. We can buy just what we need without having to buy an entire brick of pulp or container of purée.

Peeled Tamarind Pod
Tamarind peels easily with your fingers. As you work with it, you'll see that the pod has transverse ridges. Between every two ridges is a seed. My working rule of thumb is that the flesh of every six seeds will make a half a cup of tamarind water. If I'm cutting tamarind pulp from a brick of tamarind, I'll use the same amount, about one and a half to two ounces of tamarind.

Six Sections Per Half Cup of Water
For each half a cup of tamarind water, I break off six sections containing six seeds. In a bowl, I submerge the tamarind under warm water and let it soak, periodically rubbing the flesh off the seeds.

Tamarind Water
After a half an hour in warm water, you'll be able to work the tamarind with your fingers and rub all the flesh into the water. Discard the seeds and you're ready to use the tamarind water in your dish.

Saturday, November 28, 2020

Spaghetti Squash with Bison Ragù

Being limited to the house by COVID started us off the wrong path, gaining a ton of weight through the summer when we are normally a lot more active than we were this year. We've really been watching what we're eating and drinking since the end of August and we're down over a combined 30 pounds now.

We're eating a lower-carb diet and the carbs we are eating are complex carbs such as beans and oats. In addition, we are watching our fat intake, eating mostly lower fat proteins. In recent weeks, we are shifting to a mainly seafood and vegetarian diet, so the meat that we are eating is limited to what we have stored in the freezer.

We still had a pound of 90% lean ground bison in the freezer and what better to do with ground meat on a cold day than a ragù? We also have a local produce store that is seasonal, closing just before Thanksgiving each fall. In the last week or so, everything is marked way down and we stocked up on storage vegetables: onions and several winter squash, including a few spaghetti squashes. So it is natural with our low-carb outlook to want to put our lovely bison ragù on ersatz spaghetti, roasted spaghetti squash.

Spaghetti Squash with Bison Ragù
Don't get me wrong: this dish is not handmade pasta with long-cooked salsa bolognese, but it is a waist-friendly dish for a cold day, delicious in its own right.

Soffritto for Ragù
Sauce Starting to Cook
Note Color Change in Finished Sauce
When I am making a long-cooked full-fat ragù, I first cook cubes of meat in plenty of fat to brown it well, then remove them from the pan, leaving behind the fat in which to cook the soffritto with garlic and dried basil. My soffritto is generally equal parts onions, carrots, and celery, and I typically have a higher vegetable to meat ratio than is traditional, because I am often trying to stretch a little meat a long way.

Once the soffritto is soft, I deglaze with white wine and reduce that to nothing, then add a good amount of heavy cream and a bunch of peeled and seeded tomatoes along with the meat. The sauce will then cook for several hours until is ready to go, the meat being shredded just by the action of stirring the pot. You need to be attentive to stirring the pot towards the end because the sauce will be really thick and can burn easily enough.

Right, so that's the traditional method that takes hours to make. But what if you only have 45 minutes to get dinner on the table and you want a low-fat sauce?

I start by browning lean ground meat, in this case bison, as best as I can with a little pan spray. When the meat is cooked through, I add the soffrito right in with the meat and cook for a few more minutes until the onions turn translucent.

Then I splash the pan with a little white wine for form, not because there are any brown bits on the bottom of the pan to scrape off into the sauce. I omit the cream to lower the fat, but also because I find that cream takes hours to integrate into the sauce and become that je ne sais quoi for which salsa bolognese is renowned.

The tomatoes go in and the sauce cooks for as much or little time as I have before needing to get dinner on the table. The sauce above cooked for about 45 minutes. You can see the color change from beginning to end.

Kitchen Basics: Roasting Spaghetti Squash


Spaghetti Squash Ready for Oven
Stringing Roasted Spaghetti Squash with a Fork
Roasting spaghetti squash is dead simple. The only tricky part is splitting the squash in two lengthwise, principally because the squash wants to roll on the cutting board. If you are uncomfortable with the squash rolling a bit, wedge a dish towel under both sides to form a cradle for it.

Drive the tip of your knife into the top of the squash and lever the blade down like the handle of a paper cutter. Then remove the knife and reposition it to the end of the cut you have opened, repeating until you split the squash in two.

The stem end is often a really tricky proposition in that the stem will not split, so start at the stem end and work your way to the other end, leaving the stem intact. When the two haves are nearly separated and joined only by the stem, you can break the two halves apart with your hands.

Using a spoon, scrape out all the seeds. You can roast and eat the squash seeds if you like or put them in the compost pile so you have baby squash coming up everywhere in the spring!

Oil the cut surfaces of the squash and place the cut faces down on a sheet tray. Place in a moderate oven (350F) and roast until you can easily pierce the shell with a knife, half an hour or longer.

Remove from the oven and let cool to the point where you can handle the squash. Using a fork, scrape out the squash strands lengthwise down the squash, leaving an empty shell.

You can pitch the shells or for something different, you can combine the squash with other ingredients and stuff it back into one of the halves, then rebake it for twice-baked spaghetti squash. If your stuffed squash wants to roll on your sheet tray, wedge both sides with a ball of aluminum foil.

Thursday, November 19, 2020

Kitchen Basics: Dicing Pineapple

Pineapples can seem daunting to prepare because of their odd shape, but with a couple of tricks, they become child's play. Following is a photo essay on prepping pineapples. The end result here is diced pineapple, which I ultimately used for salsa, but using these techniques, you can cut your pineapple into whatever size pieces you desire.

Lay the Pineapple Flat on the Board
Remove Both the Top and Bottom
Standing on End, Remove the Sides in Strips
Cut Deep Enough to Remove the "Eyes"
Once Peeled, Slice in Half Lengthwise, Then Again Into Quarters
Remove the Core on the Bias
Four Quarters Ready to Slice
Bottom to Top: Quarter, Strips, Halved Strips, Dice

Monday, October 12, 2020

Kitchen Basics: Cubing Butternut Squash

When you want cubes of winter squash for a dish, go for butternut because of its high yield (flesh to seed ratio) and its ease of handling. Because winter squashes are hard, they are difficult to cube, so most of the oddly shaped ones end up baked, with the cooked flesh scooped out with a spoon. Butternut is the easiest of all to cut because the neck is smooth and solid flesh. Still, without a plan, they can be difficult to work with. Here are the basics of cubing a butternut.

1. Cut out the Neck
For butternut squash that you are going to cube, try to buy ones with necks that are roughly the same diameter from the top down to the bell. Cut off the top where the squash attaches to the vine, cutting straight across. Likewise, on the other end slice straight through to cut off the bell that contains the seeds. Reserve the bell for soup or some other application. It is good squash, but because of its shape, it will not cube well.

2. Peel the Neck
Stand the neck vertically and using a knife (serrated works wonders for this), peel off the rind in strips.

3. Slice off a Slab to Make a Stable Base
The trick to safely cutting any odd-shaped foodstuff is to make yourself a flat, stable base that you can lay on your cutting board. A flat surface will not rock when you cut. This is critical with hard foods such as winter squash where you are going to have to use a little muscle to make the cut.

In the photo, you see that I took a slab off the side. The safest way to make this cut is with the neck standing vertically. If you try to make it with the squash laying horizontally on the cutting board, be very careful that it does not rock.

4-5. Slab and Cut into Strips
Rotate the barrel of the squash so that the now-flat side is down against the cutting board. Continue to cut it into slabs the width of the cubes that you want to make.

Once you have cut the squash into slabs, cut each slab into strips the width of the cubes that you want to make. Once you get the hang of it and are confident about your knife work, you can stack two or three slabs before cutting strips, as long as the stacked slabs are stable and do not rock.

6. Cut into Cubes
The last step is to gather as many strips as you feel comfortable cutting at one time and make the final cuts to turn them into cubes.

Sandy Hook, Oregon

Over the past few years, I have found I process trauma by hiking and by writing. On Thursday October 15, my town, Bend, Oregon joined the in...