Showing posts with label squash. Show all posts

Saturday, October 21, 2023

Last Hurrah of Summer

In late October, the weather here in lovely Bend OR can be a real crapshoot. We could as easily have mild temperatures as snow. This year, we had some terrific Indian summer weather, perfect for gathering around the fire pit long after dusk. Just back from our trip to Truckee to see Mark and Kelley, we invited Rob and Dyce over Saturday night, the plan to enjoy this last hurrah of pretty weather before winter sets in for good. (As I type, my fingers cold in my chilly office, it is 18F outside, brrrr!)

To go with the awesome weather, Ann wanted me to make a summery dish for dinner, squash cakes, a  staple at the restaurant in season. So popular were they that I had customers begging for them in February when in our climate there in Virginia, we couldn't even set the baby squash plants out until May 15 or so, let alone have ripe fruit. I really couldn't take them off the menu from July to October when squash were in season without risking severe backlash from customers.

The squash cakes were born of a need to use massive amounts of zucchini. If you've ever grown squash, you know that when they start producing, they really come on gangbusters to the point where you may find yourself swimming in squash. It is a real trick in the restaurant business to get people to not only order something mundane that they don't really want to spend money on such as summer squash, but to get them to crave that dish to the point where you cannot take it off the menu. This is such a dish, a real coup in the kitchen, but it requires a lot of labor and time to pull off.

Before our dinner of squash cakes, we sat around the fire pit outside enjoying the last hurrah of summer. To go with our wine (Bordeaux blanc-style Semillon-Sauvignon blanc), I wanted finger food, but I had a salad (horiatiki) on the brain. So I put together these little skewers of cucumber, tomato, pickled peppers, feta, and olives. When I make horiatiki, I dress it traditionally in olive oil and lemon juice with oregano, but that dressing would be too loose and messy for finger food, so I whipped up a quick batch of tzatziki that we could daub on our skewers without too much risk of a mess.

Horiatiki Skewers with Tzatziki
After our appetizers when it was good and dark outside, we moved into the kitchen and I fried up the batch of squash cakes that I had made earlier in the day. The process is time consuming, but I find the results worth the effort.

I'm Using Grey Zucchini Here, Two Per Person
You Can Use Any Summer Squash
Grated on a Box Grater
I Wouldn't Dirty the Food Processor for Only 8 Squash
In Batches, Wring the Water Out in a Clean Towel
We Made a Light Cucumber-Tasting Sorbet from the Drained Liquid
Cook the Dry Squash in Cream
Cook All the Liquid Out
Season and Bind with Grated Pecorino and Panko
Refrigerate to Set, Then Patty out Squash Cakes
Lightly Flour or Bread the Squash Cakes, Then Fry
To go with the squash cakes, I always serve tzatziki; they are a natural combo. This time, I was feeling a light pasta salad as a side dish, so I cooked a batch of orzo and tossed it with lemon juice, olive oil, and oregano. Then I stirred in feta, wilted spinach, and just a few bits of tomato for color.

Orzo with Spinach, Feta, and Tomatoes
These squash cakes are pretty delicious but they take a long time to prepare. They're also a bit tricky to cook, too, because they want to get really creamy in the center. You have to form a good crust on them in the pan; it's the crust that holds the very soft cakes together. It's also that crust that makes a delicious crunchy contrast to the creamy center that makes this dish so delightful.

Friday, June 11, 2021

Something Old, Something New

From earlier in the spring, a couple of dishes celebrating the first asparagus of the year and the final butternut squash from winter storage, "Something Old, Something New."

The first dish took full advantage of a rare sunny spring day to grill both the asparagus and the butternut squash, giving them a nice char that works against the sweetness of the scallops. Garnishes are a quick sweet chile sauce and Korean chile threads known as sil-gochu.

Scallops with Grilled Asparagus, Grilled Butternut, Sweet Chile Sauce, and Chile Threads

Grilling the Veg
Black Steel Gives a Perfect Sear Every Time
Sweet Chile Sauce (Agave, Sambal, Salt)
The second dish came on the following night when the weather turned back to its usual rainy springtime norm, making us want something warm and comforting, the genesis of the butternut lentils, a batch of brown lentils cooked with cubes of the bell of the butternut, the leftover bits that I couldn't slice for the grill the evening before. The salad is shaved raw asparagus dressed with lemon juice, olive oil, and salt.
King Salmon, Butternut Lentils, and Shaved Asparagus Salad

Saturday, January 30, 2021

Tacos de Calabaza

It's no secret that we love tacos and we love really tasty vegetarian food, so I've been making a lot of vegetarian tacos: rajas con crema, grilled vegetable, spaghetti squash and black bean, and now, butternut squash and poblano pepper.

I thought of these orange and green tacos some weeks ago but I hadn't committed the time to roast butternut squash cubes until yesterday. The idea came from a vegetarian green chile with butternut that I made about the beginning of December. I knew the sweet roasted flavor of the squash would pair tremendously with the mildly spicy earthy flavor of the poblanos. The result was wicked good.

Tacos de Calabaza: Butternut Squash and Poblano
To make the taco filling, I cubed and roasted a butternut, then made a quick sauté of large dice of poblano, diced red onion, sliced green onion, minced garlic, and minced cilantro stems, with just a hint of ground mild Numex chile. I added the squash to the sauté and seasoned it before serving it on corn tortillas with chipotle adobo, cotija cheese, and cilantro leaves. Keeper!

Tuesday, January 12, 2021

Spaghetti Squash and Black Bean Tostadas

Spaghetti Squash and Black Bean Tostadas
The last time that I made spaghetti squash with black beans and baked it into a casserole, Ann commented that she'd really like the dish if I were to make it as a tostada topping. You can find the recipe for the topping at the link above. Last evening, I baked a spaghetti squash and made the tostadas that she asked for.

Making Tostadas

Although I see bags of tostadas flying off the shelves at the local supermarket, I don't see the point of buying them, if you have time to make them yourself. All it takes is a bag of corn tortillas, two sheet trays, an oven, and about 45 minutes. Although I lay out the process below, there is a step-by-step photo shoot of how to do it here.

To make tostadas, I lay 8 corn tortillas on a sheet tray, 3 along each side and two in the center. Then I top the sheet tray with another such that the tortillas are trapped between the two sheet trays. This will keep the tostada shells relatively flat.

The tortillas go into a moderate (350F) oven for fifteen minutes, at which point I pull them out of the oven and take the top sheet tray off. This lets the water vapor escape. Then I flip the tortillas over. At this point, you will see that they have shrunk to the point where all eight fit on the sheet tray with almost no overlap.

Re-covering the tortillas, I put them back into the oven for another 15 minutes and repeat the same process for a final 15 minutes. At this point, the tortillas should be dry and crisp. Pull them out and leave them uncovered until you are ready to eat. The hot tortillas will continue to evaporate any last bits of water in them as they cool.

You should eat the tostadas right away, but if you cannot, once they have cooled to room temperature, you can store them for a very long period in a tightly covered container. Humidity is their enemy so keep them cool and dry.

Vegetable "Lasagna"

Ann put me onto the idea of making a vegetarian lasagna a week or so ago. It was kind of a fun dish to assemble and eat. Naturally, it would have been a lot better if I weren't working so hard to minimize the fat in it, but it was delicious.

Vegetable "Lasagna"
Once I assembled the lasagna, it baked in a moderate (350F) oven for an hour to heat through and crisp the pecorino romano that I grated over the top. I filled the oiled 9x9 baking dish level with the top rim and as you can see in the photo, the lasagna puffed up about a half an inch above the rim of the dish. It later settled back as it cooled.

Baked Squash Slices for "Noodles"
I started by cutting several (let's call it 9 or 10) small zucchini and Lebanese squash (the light green, small straight squash) into 5-6 slices each and placing the slices on two sheet trays sprayed with pan spray. They went into a moderate oven (350F) with a turn every fifteen minutes for about an hour.

The point of pre-cooking them is to evaporate much of the water in the squash so that it does not bleed into the lasagna. I jammed the slices together as closely as possible until both sheet trays were full. You can see how much shrinkage there was in the oven; that's water that will not dilute the dish.

I know that Ann wanted me to use eggplant in the dish as well but it is winter now. While we have a year-round supply of decent summer squash at the store, the eggplants tend to be terrible out of season. I just want Ann to note that I have bent my rule about using out-of-season produce (the squash) to make her what she requested.

Extra Thick Marinara
To make the tomato sauce, I roughly blended two drained 28-ounce cans of diced tomatoes and then put them on the flame to reduce and thicken. To the pan, I added four cloves of garlic (minced), a tablespoon of dried basil, and a pinch of red pepper flakes. I never salt dishes that are going to be highly reduced until the end for fear of overly concentrating the salt.

When reducing tomato sauce, you really want to watch the flame so that you don't send geysers of red sauce all over the kitchen, especially as the sauce becomes thick. It took about an hour of cooking to reduce the sauce to the point you see above, with me getting up from my movie every 10 minutes to check the flame and stir the sauce.

White Bean and Pesto Purée
For the alternating layers, I decided to make a purée of white beans and pesto. I drained four 15-ounce cans of white beans and put them in the food processor with a tablespoon and a half of pesto. It took several minutes for the food processor to convert the very dry beans to a smooth but stiff purée. I seasoned it to taste with salt.

Then came the assembly: a thin layer of marinara, a layer of squash, a layer of beans, a layer of squash, a layer of marinara, a layer of squash, a layer of beans, a layer of marinara, and a grating of pecorino romano.

This was a fun dish for a lazy and cold winter Sunday afternoon.

Sunday, December 20, 2020

Vegetable Tacos

Vegetable tacos are something that I started making seriously this summer during grilling season and because they are so delicious, have become a regular quick dinner chez nous. Since I first posted about them back in October, I have formulated a strategy for making them that I will outline below, using vegetables that I prepared stovetop.

Vegetable Tacos
As I have been experimenting with dozens of veggie tacos, I have fallen into a procedure which involves mixing cooked ingredients with raw ingredients just before serving. This yields a warm, but super fresh taco.

Preparing the Raw Ingredients
In a large bowl, I mix the raw ingredients: green onion, cilantro, tomatoes, cotija, and finely minced chipotle. In season, I would likely include raw corn in this mix.

Searing the Cooked Ingredients
For the cooked ingredients, which I grill in good weather, the mix varies depending on what I have on hand. This pan contains onions, poblanos, yellow squash, and asparagus. Almost anything goes in veggie tacos and I have used eggplant, zucchini, and green beans this past summer. To mimic the intense cooking on the grill, sear the veggies hard if you are using a pan.

When the veggies are done, mix them immediately with the raw ingredients and season to taste with salt and spice. Serve with slices of lime on warm corn tortillas.

Although veggie tacos don't sound all that great, I assure you that they are delicious and addictive.

Wednesday, December 9, 2020

Chile Verde con Calabaza

It's not a big secret that I love poblano peppers, the large dark green mild chiles from central Mexico, now grown all over and available in most American grocery stores. I discovered poblanos a long time ago as a young man while living in Texas, an opportunity that dramatically expanded my culinary horizons and firmly cemented my love of Mexican food.

I was a poor graduate student living on a $650 per month stipend for teaching undergraduates at Texas A&M. My apartment was $400 per month, so you can imagine that making ends meet on $250 per month was difficult. It forced me to shop where the day laborers shopped, at the bodegas and mercados, and to eat what they ate: lots of beans and tortillas. But it also gave me the opportunity to learn about cilantro, cumin, nopales, dried chiles, tomatillos, posole, menudo, and not least of all, poblanos, all of which I got to taste and cook for the first time in Texas.

When I tasted poblanos for the first time, I was struck by their essential pepper flavor, deep with just a hint of spice, but﹘and here's the payoff for me﹘none of the grassy, bitter, pyrazine flavors that we associate with bell peppers. I don't really care for those flavors in a cooked bell pepper and worse still, like a lot of folks, I despise them when I keep tasting them all night long. For me, poblanos are a glorious solution to that problem and I have not been without them since discovering them.

In the mid-1980s when I moved to the Maryland suburbs of Washington DC, poblanos were hard to find, unlike today when they are a staple at most groceries. The situation improved by the 1990s when they started making appearances in large groceries, even out in the rural Shenandoah Valley of Virginia where I lived at the time. And by the time I started my restaurant in 2002, they were common. Poblano peppers were the only mild green pepper that I used at the restaurant.

And it was at the restaurant when my love affair with poblanos and chile verde really bloomed. We would change the menu daily in response to what our farmers were bringing us. And to make use of the vast quantities of tomatillos and poblanos that we would get in late summer, chile verde was a regular feature on the menu and for staff meals. Diners would probably never recognize the unctuous and delicious green sauce garnishing their plates as chile verde, but there it was nonetheless.

Suffice it to say that when summer slips into fall and brings out the annual hankering for soups and stews, my thoughts run to chile verde. A few weeks ago when I made yet another batch of chile verde, I saw a butternut squash on the counter, pretty typical for this time of year, and thought that it would make a terrific vegetarian chile verde. Ann and I are trying to reduce the amount of meat that we eat without compromising on flavor and I had the idea that really hard roasted butternut could in part take the place of meat. Hence the chile verde con calabaza experiment.

Chile Verde con Calabaza
Garlic, Green Onions, Cilantro, Onions, Poblanos
Cooking the Vegetables
Roasted Butternut Squash
There are a couple of ways to make chile verde, at least. Sometimes, I will put all the vegetables (onions, poblanos, garlic cloves, and tomatillos) on sheet trays and roast them to concentrate their flavors. Then I will add them to broth and make the stew. This is typically the approach I take when working with fresh tomatillos, which are a thing of the past at this time of the year.

Other times, such as this time, I will sauté the vegetables directly in the soup pot and use canned tomatillos. I will rinse the tomatillos and put them back in the can with water or stock and blend them with my stick blender to form the soup base.

Butternut squash can be insipid or delicious. It is really bland when lightly cooked, but like many things, it concentrates and develops deep complex flavors when really roasted. It takes a long time in the oven to achieve the level of concentration of the squash that you see in the photo above. This squash roasted in a hot oven 400-425F) for an hour and a quarter. After all that water evaporates from the squash, you will have about a third as much squash by weight and volume as you started with.

Chile Verde con Calabaza


The following recipe feeds about four people. It fed the two of us quite well, with leftovers for lunch the day following.

1 large butternut squash, about 5 pounds
6 poblanos, chopped
3 yellow onions, chopped
1 bunch of cilantro, chopped, stems chopped fine
1 bunch of green onions, sliced
8 cloves garlic, minced
1 28-ounce can of whole tomatillos
2 quarts of vegetable stock or water (or meat stock if you prefer)
1 teaspoon Mexican oregano
salt to taste
6 corn tortillas, chopped

Cube the butternut squash and put on an oiled sheet tray in a hot oven (425F), turning every 15-20 minutes until the squash browns on all surfaces. It will take an hour or longer. You should not rush this step as it is critical for the development of flavor.

In a large soup pot, sauté the poblanos, onions, cilantro, green onions, and garlic until the onions turn transparent.

Drain and rinse the tomatillos. You can add them directly to the soup pot as-is or you can blend or chop them, your choice. It takes longer for whole tomatillos to break down, so I like to speed things up and to obliterate the skins by blending. I put them back in the can and cover them with water, then roughly blend them directly in the can with my immersion blender, leaving some texture. You can always throw them in the regular blender or chop them with a knife.

Add the tomatillos and stock/water to the pot and rub the the oregano between your palms over the pot to break it down.

Let the stew simmer gently for 45 minutes to an hour to meld the flavors. Season to taste and add the tortillas. Cook for an additional 15-20 minutes to break down the tortillas which will thicken the stew. You can always use fresh or dried masa as a thickener. And you don't have to thicken at all if you want more of a soup than a stew.

Ten minutes before service, add the butternut squash to the pot to warm back through. It is important that you not cook the squash for longer or it will start to break down. Breaking down is OK if you want to make an orange squash soup, but for a green stew with discrete chunks of roasted squash, less cooking is more.

Sunday, December 6, 2020

Spaghetti Squash-Black Bean Casserole

Spaghetti squash does not have to be boring. I'm always trying to think of ways to make it taste good. We might be eating vegetarian, but there is no reason our food cannot have wide appeal, even for meat eaters. In this quest, I decided to make a southwest-inspired casserole using black beans and it turned out really wonderful. The little bit of cheese on top made us think that we were eating something really bad for us.

Spaghetti Squash-Black Bean Casserole
Just about any dish involving spaghetti squash involves first roasting and stringing the squash to separate it into spaghetti-like strands. Click here for a refresher on roasting spaghetti squash, if you need it.

Spaghetti Squash Mix
The dish is really simple. First I sautéed onions, poblanos, cilantro stems, and garlic with spices, then I added black beans, sliced green onions, and roasted spaghetti squash. Once the mix was well stirred and seasoned, into an oiled casserole it went with a thin topping of cheese.

Spaghetti Squash-Black Bean Casserole


The ingredients and amount of ingredients in this casserole are highly flexible. The quantity that this recipe makes is enough to fill my cast iron Le Creuset casserole, what the French call a plat ovale. A casserole in France is a sauce pan over here.

oil to film pan
1 large yellow onion, diced
2 poblano peppers, diced
stems of 1 bunch of cilantro, minced
6 cloves garlic, minced
1 ounce mild ground chile
1 tablespoon ground cumin
1 chipotle in adobo, finely minced
1 large spaghetti squash, 4-6 pounds, roasted and removed from the shell
2 15-ounce cans black beans, drained and rinsed
1 bunch green onions, sliced
salt to taste
1/2-1 cup grated (cheddar) cheese

Film a large pan with oil over high heat. Add the onions, peppers, cilantro, and garlic. Sauté until the onions turn translucent. Add the chile, cumin, and chipotle and mix well. Cook for a couple additional minutes to cook off the raw cumin flavor. Turn off the heat and add the squash, beans, and green onions. Mix well and season to taste.

Spray a casserole dish with pan spray, then pack the squash mix into the pan. Top with a little cheese and place in a moderate oven (350F) until the cheese browns, 20-30 minutes.

Saturday, December 5, 2020

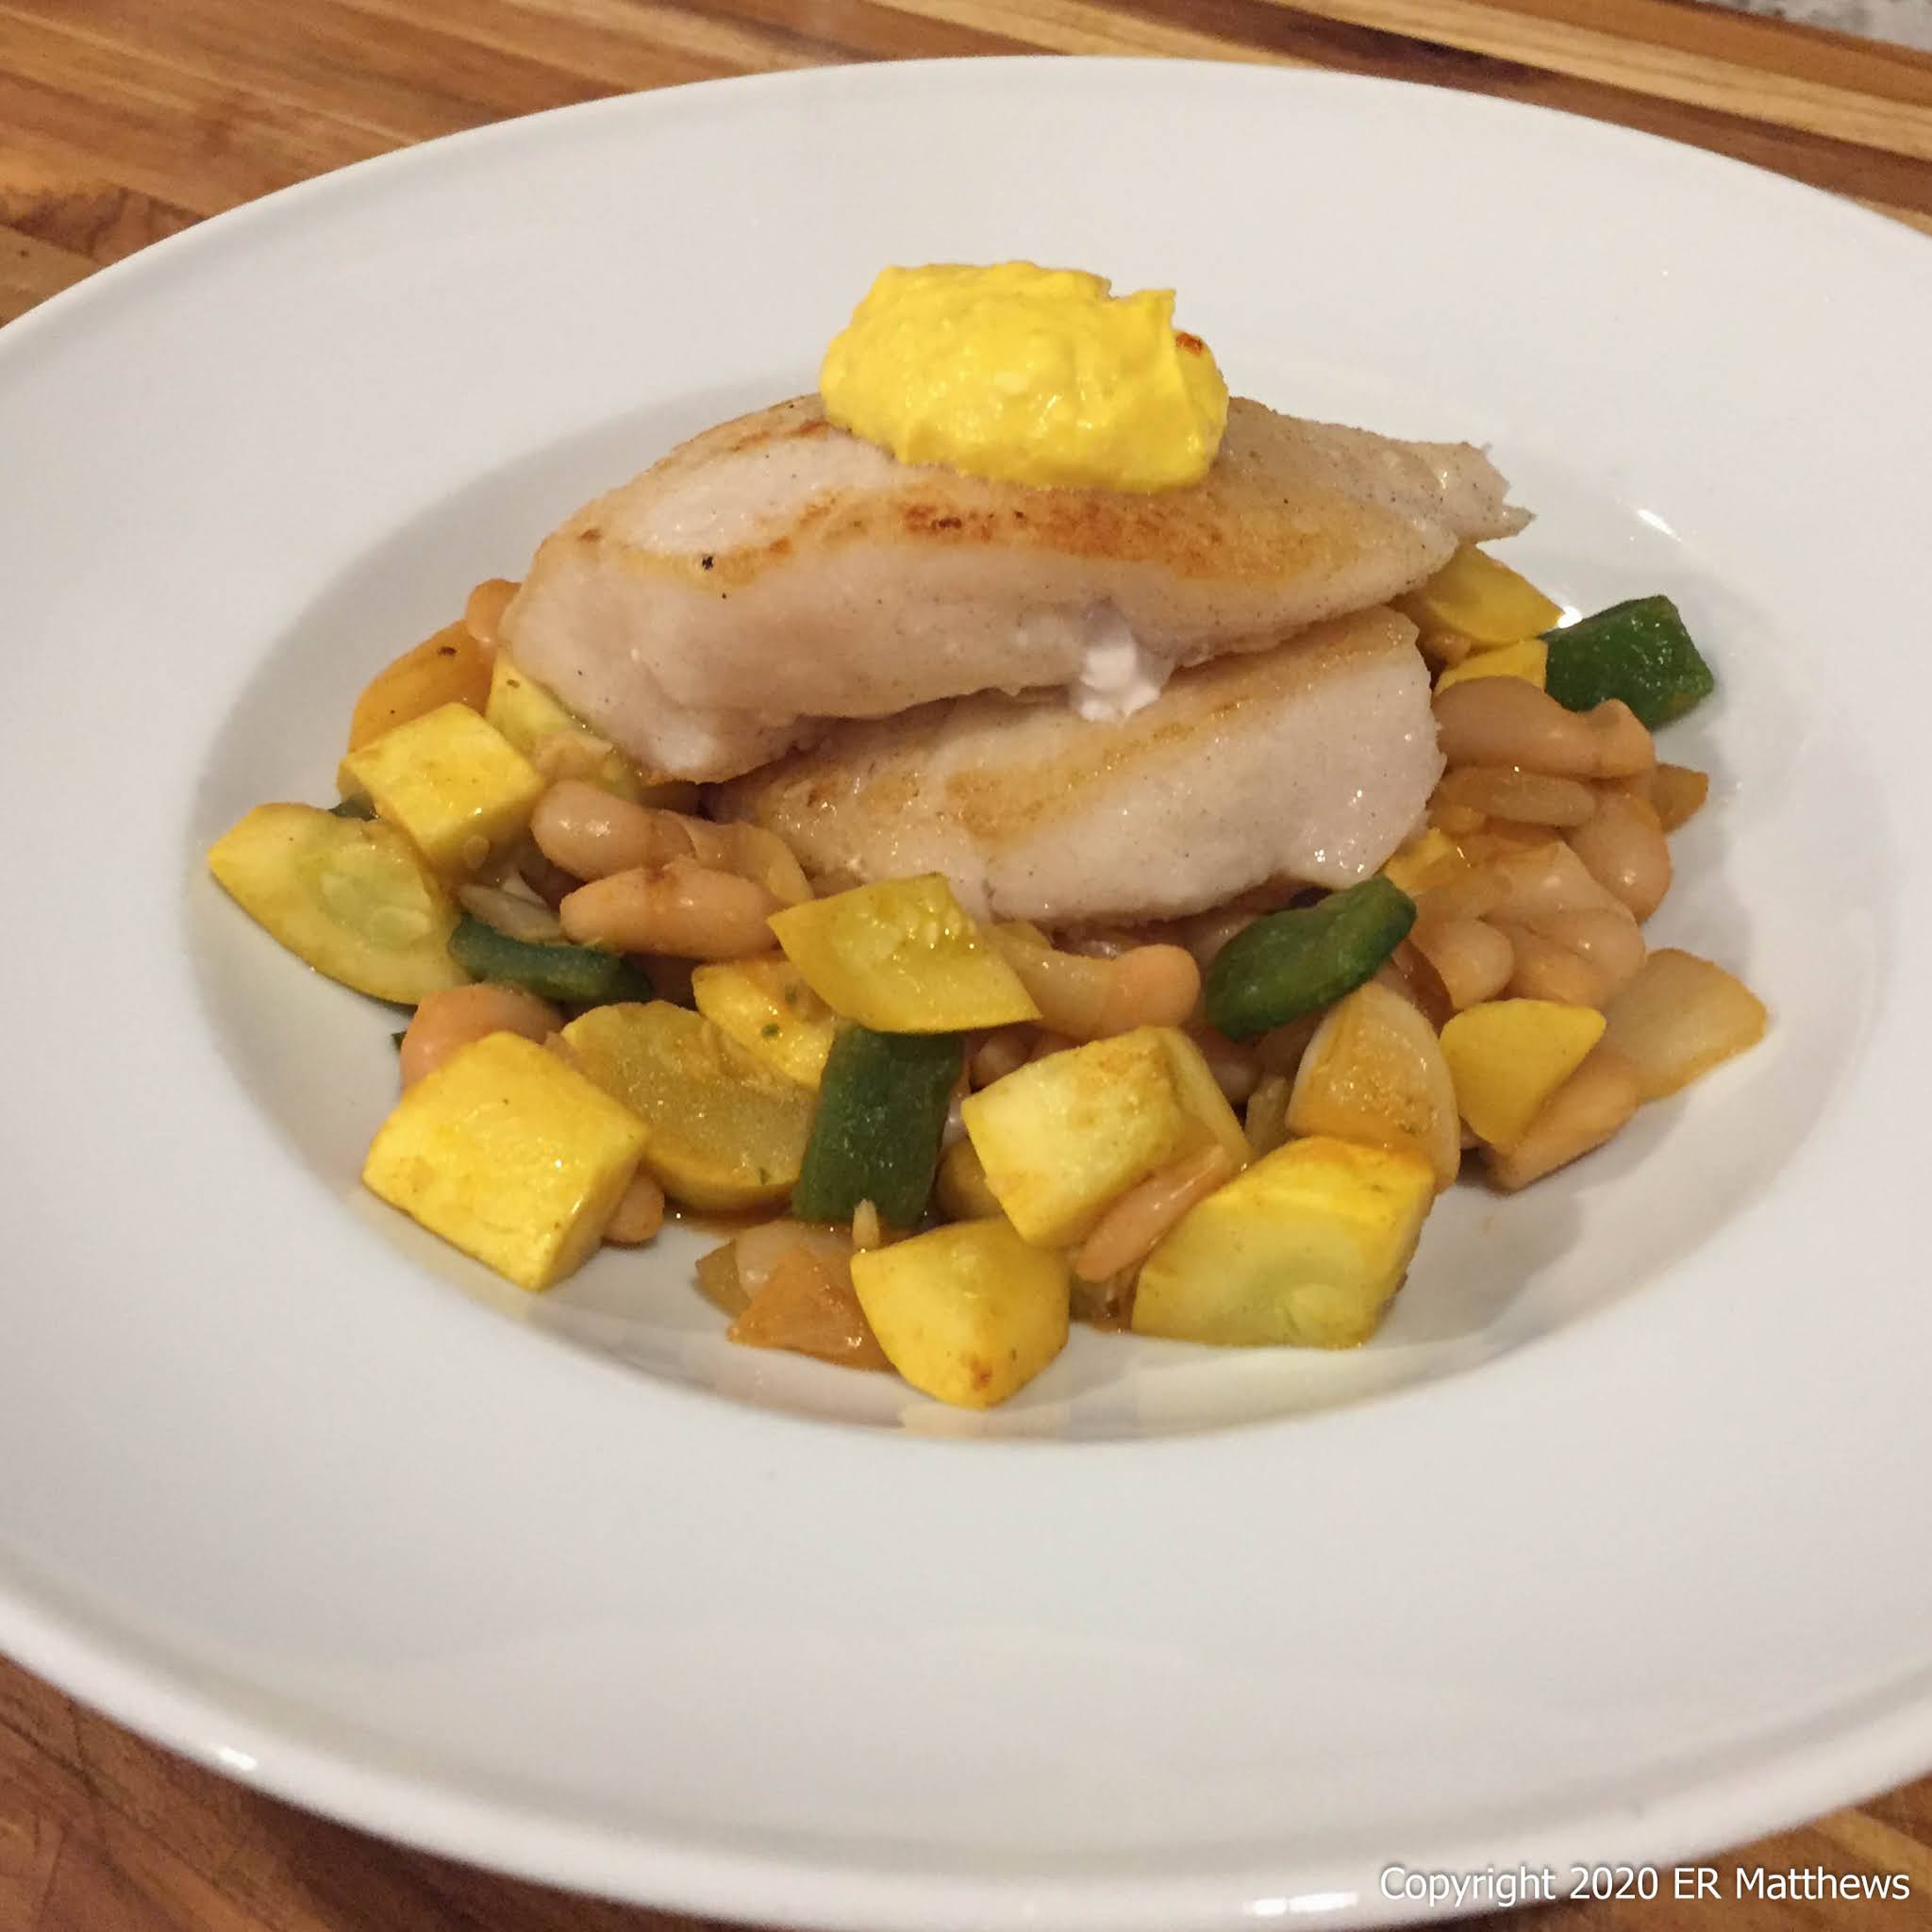
Pacific Cod with White Bean Sauté and Saffron Aioli

Every now and again, we need to have something just a touch bad in our diet and saffron aïoli fills that bill well. It's something that we used to serve with fish often at the restaurant, especially the baccalà cakes that we would make from cod that we salted ourselves. If you've ever seen the crap that passes for commercial baccalà in the US, you'd make your own too.

Pacific Cod with White Bean Sauté and Saffron Aïoli
We had bought a really nice looking piece of Pacific cod at the store and were looking for a quick dinner. I rummaged the refrigerator and found a poblano pepper and yellow summer squash, so I chopped those with an onion and some garlic and made a quick white bean sauté as base for the fish. The saffron aïoli is a garnish that blends well with both the fish and the white beans.

Garlic, Saffron, and Salt
When making aïoli, I always insist on using the mortar and pestle to achieve a very fine paste. It is impossible to use any other method to get the garlic so finely pounded, especially when making a tiny quantity of aïoli. In this case, I pounded half a clove of minced garlic, a few saffron threads, and a pinch of salt. The sharp edges of the salt crystals act as grist to help grind the garlic and saffron to a paste.

Be aware that garlic becomes extremely pungent when pounded to a paste. In other words, a little goes a long, long way. Take this friendly word of advice from a garlic fiend.

I have had this green granite mortar and pestle a very long time, since the early 1990s, before kids. I recall it being about $45 back then, imported directly from Thailand. A similar mortar will set you back about $90-100 now, but will last forever. Mine saw daily use in the restaurant for 15 years and except for one little flake off the edge, is as good as new. 

Granite is beastly heavy, but that is what you want in a mortar. You want it to sit still on the counter, not move around, and transmit the full force of the pestle strikes into the food being pounded. Notice that I sit mine on top of a towel to keep it stationary on the counters. In the restaurant, we would put it on a cutting board directly over one of the legs of a table or, more likely, sandwich unit so that the mortar would be well supported. If all the energy is going into a flexing table top, the mortar is going to be of little use.

Garlic-Saffron Paste
While traditional aïoli is made from egg yolks and olive oil, I long ago switched to using mayonnaise, for liability reasons. I did not want to make and serve a product based on raw eggs that was not going to be consumed immediately.

I added a tablespoon of mayo directly to the mortar, mixed everything well, and let the aïoli stand for an hour before serving. Saffron, in particular, takes time to color the mayonnaise. The saffron aïoli will look quite blond when you first make it, but will go the screaming brilliant saffron yellow that you see in the top photo given time.

I only made a tablespoon of aïoli because Ann and I are both fiends for it. We could eat it with a spoon! To avoid all temptation, I made just barely enough for dinner.

Saturday, November 28, 2020

Spaghetti Squash with Bison Ragù

Being limited to the house by COVID started us off the wrong path, gaining a ton of weight through the summer when we are normally a lot more active than we were this year. We've really been watching what we're eating and drinking since the end of August and we're down over a combined 30 pounds now.

We're eating a lower-carb diet and the carbs we are eating are complex carbs such as beans and oats. In addition, we are watching our fat intake, eating mostly lower fat proteins. In recent weeks, we are shifting to a mainly seafood and vegetarian diet, so the meat that we are eating is limited to what we have stored in the freezer.

We still had a pound of 90% lean ground bison in the freezer and what better to do with ground meat on a cold day than a ragù? We also have a local produce store that is seasonal, closing just before Thanksgiving each fall. In the last week or so, everything is marked way down and we stocked up on storage vegetables: onions and several winter squash, including a few spaghetti squashes. So it is natural with our low-carb outlook to want to put our lovely bison ragù on ersatz spaghetti, roasted spaghetti squash.

Spaghetti Squash with Bison Ragù
Don't get me wrong: this dish is not handmade pasta with long-cooked salsa bolognese, but it is a waist-friendly dish for a cold day, delicious in its own right.

Soffritto for Ragù
Sauce Starting to Cook
Note Color Change in Finished Sauce
When I am making a long-cooked full-fat ragù, I first cook cubes of meat in plenty of fat to brown it well, then remove them from the pan, leaving behind the fat in which to cook the soffritto with garlic and dried basil. My soffritto is generally equal parts onions, carrots, and celery, and I typically have a higher vegetable to meat ratio than is traditional, because I am often trying to stretch a little meat a long way.

Once the soffritto is soft, I deglaze with white wine and reduce that to nothing, then add a good amount of heavy cream and a bunch of peeled and seeded tomatoes along with the meat. The sauce will then cook for several hours until is ready to go, the meat being shredded just by the action of stirring the pot. You need to be attentive to stirring the pot towards the end because the sauce will be really thick and can burn easily enough.

Right, so that's the traditional method that takes hours to make. But what if you only have 45 minutes to get dinner on the table and you want a low-fat sauce?

I start by browning lean ground meat, in this case bison, as best as I can with a little pan spray. When the meat is cooked through, I add the soffrito right in with the meat and cook for a few more minutes until the onions turn translucent.

Then I splash the pan with a little white wine for form, not because there are any brown bits on the bottom of the pan to scrape off into the sauce. I omit the cream to lower the fat, but also because I find that cream takes hours to integrate into the sauce and become that je ne sais quoi for which salsa bolognese is renowned.

The tomatoes go in and the sauce cooks for as much or little time as I have before needing to get dinner on the table. The sauce above cooked for about 45 minutes. You can see the color change from beginning to end.

Kitchen Basics: Roasting Spaghetti Squash


Spaghetti Squash Ready for Oven
Stringing Roasted Spaghetti Squash with a Fork
Roasting spaghetti squash is dead simple. The only tricky part is splitting the squash in two lengthwise, principally because the squash wants to roll on the cutting board. If you are uncomfortable with the squash rolling a bit, wedge a dish towel under both sides to form a cradle for it.

Drive the tip of your knife into the top of the squash and lever the blade down like the handle of a paper cutter. Then remove the knife and reposition it to the end of the cut you have opened, repeating until you split the squash in two.

The stem end is often a really tricky proposition in that the stem will not split, so start at the stem end and work your way to the other end, leaving the stem intact. When the two haves are nearly separated and joined only by the stem, you can break the two halves apart with your hands.

Using a spoon, scrape out all the seeds. You can roast and eat the squash seeds if you like or put them in the compost pile so you have baby squash coming up everywhere in the spring!

Oil the cut surfaces of the squash and place the cut faces down on a sheet tray. Place in a moderate oven (350F) and roast until you can easily pierce the shell with a knife, half an hour or longer.

Remove from the oven and let cool to the point where you can handle the squash. Using a fork, scrape out the squash strands lengthwise down the squash, leaving an empty shell.

You can pitch the shells or for something different, you can combine the squash with other ingredients and stuff it back into one of the halves, then rebake it for twice-baked spaghetti squash. If your stuffed squash wants to roll on your sheet tray, wedge both sides with a ball of aluminum foil.

Monday, November 23, 2020

Steelhead Trout with Curried Zucchini Noodles

Ann loves zucchini noodles. I'm pretty ambivalent about them, but she really seems to love them to the point where she asked me to buy a turner for our home kitchen. Long before the "zoodle" craze, we were turning squash and lots of other vegetables into noodles at the restaurant. We often turned raw beets to toss with arugula and goat cheese in a wonderful and unexpected salad.

With our primary farmers market closed for the season now, our selection of vegetables is really hit or miss, but if there is nothing better looking at the grocery store, the summer squashes always seem to be decent looking.

Quick Dinner: Steelhead Trout on Curried Zucchini Noodles
The other night I was looking for a dinner that I could pull off in 15 minutes and armed with two zucchini and 3/4 of a pound of steelhead trout, I decided to make Ann's favorite form of zucchini as an accompaniment to the fish.

Annie Helps Turn the Noodles
So many people blanch zucchini noodles in water, but in most cases, I think that this is a fail. It only seems to dilute the noodles. If they are going in a sauté, I prefer to put them in raw. It takes almost no time on the heat to cook them through.

For this dish, I started half a sliced onion going in a large skillet and once they it translucent, I added the the zucchini and a large spoonful of very fresh Madras curry powder. In less than two minutes, they were on the plate as a base for the fish.

I don't really use pre-prepared spice mixes in my cooking, but I have a weakness for yellow Madras curry powder. I know that it is not in any way Indian or even authentic, but it has a flavor that brings back memories of my mother's (fairly not good) chicken curry and of one of my favorite quick noshes, Singapore noodles.

Pinot Noir for Pregame
As we were turning the noodles, we opened a stellar local Pinot Noir. McKinlay is unknown even to most people locally, yet they consistently produce some of the most amazing Pinot in Oregon.

Wednesday, October 14, 2020

Chickpea and Roasted Butternut Squash Chili

Every now and again, I come up with a dish that is truly wonderful. I can only take credit for the execution, but not the idea. In point of fact, Ann asked me to make her chili with chickpeas and butternut squash, so I grabbed a decent-sized squash on my last trip to the farmers market. This recipe is a definite keeper. We really enjoyed it.

Chickpea and Roasted Butternut Squash Chili
This dish comes together in minutes once you have roasted the butternut squash, which you can do well in advance, even a day or two.

Roast Squash Until Caramelized
The trick to working with butternut squash is to concentrate its flavor by removing a lot of the water that it contains, otherwise it is pretty boring and will just dilute your dish. And fresh squash like I was working with are wetter than squash that have overwintered. Don't be shy about roasting your squash until it takes on good color as you can see above. This took an hour in a hot (400F) oven. I did a post earlier on how to cube butternut squash, if you need a refresher.

When roasting squash, patience is your friend, but be certain to toss the squash every 15 minutes or so such that all sides get a chance to cook. I cooked these on a dry sheet tray because I didn't want to add additional fat, but tossing the squash in a little oil before roasting will help them caramelize.

Chili Veg: Poblano, Onion, Cilantro Stems, Garlic
Sautéed Veg with Chili Spices
Start your chili by sautéeing the onion, poblano, garlic, and cilantro stems. If you read my recipes, you will see that I always call for sautéeing cilantro stems in the mix. The stems are more flavorful than the leaves and they are well suited to a mirepoix or soffrito. Please don't throw them away.

Once the onions have turned translucent, add the cumin and chile powder and cook for a minute or two before adding the water, roasted squash, and chickpeas.

Cook for about 10 minutes, season to taste, and serve. You can make yours as dry or as wet as you like. I decided to make this version fairly dry as I was not serving it over anything to sop up the broth.

Chickpea and Butternut Squash Chili

The procedure is outlined above, but I will recap it below. For four portions, use the quantities below. It takes a lot of squash. Because squash is mainly water, it is going to shrink a lot during cooking.

1 tablespoon of olive oil
1 medium onion, diced
1 large poblano, diced
4 cloves garlic, minced
stems of one bunch of cilantro, minced 
1 tablespoon freshly ground cumin
1 ounce ground mild chile (I use Numex)
1 quart water or vegetable stock
3 pounds of butternut squash cubes, roasted
3 pounds of cooked chickpeas
salt to taste

Film a large pan with oil and sauté the onion, poblano, garlic, and cilantro until the onion is translucent, about five minutes.

Add the cumin and chile powder and cook for another minute or so to get rid of the raw flavors of the spices.

Add the water, roasted squash, and chickpeas and cook for about 10 minutes at a simmer to let all the flavors come together.

Season and serve.

Monday, October 12, 2020

Kitchen Basics: Cubing Butternut Squash

When you want cubes of winter squash for a dish, go for butternut because of its high yield (flesh to seed ratio) and its ease of handling. Because winter squashes are hard, they are difficult to cube, so most of the oddly shaped ones end up baked, with the cooked flesh scooped out with a spoon. Butternut is the easiest of all to cut because the neck is smooth and solid flesh. Still, without a plan, they can be difficult to work with. Here are the basics of cubing a butternut.

1. Cut out the Neck
For butternut squash that you are going to cube, try to buy ones with necks that are roughly the same diameter from the top down to the bell. Cut off the top where the squash attaches to the vine, cutting straight across. Likewise, on the other end slice straight through to cut off the bell that contains the seeds. Reserve the bell for soup or some other application. It is good squash, but because of its shape, it will not cube well.

2. Peel the Neck
Stand the neck vertically and using a knife (serrated works wonders for this), peel off the rind in strips.

3. Slice off a Slab to Make a Stable Base
The trick to safely cutting any odd-shaped foodstuff is to make yourself a flat, stable base that you can lay on your cutting board. A flat surface will not rock when you cut. This is critical with hard foods such as winter squash where you are going to have to use a little muscle to make the cut.

In the photo, you see that I took a slab off the side. The safest way to make this cut is with the neck standing vertically. If you try to make it with the squash laying horizontally on the cutting board, be very careful that it does not rock.

4-5. Slab and Cut into Strips
Rotate the barrel of the squash so that the now-flat side is down against the cutting board. Continue to cut it into slabs the width of the cubes that you want to make.

Once you have cut the squash into slabs, cut each slab into strips the width of the cubes that you want to make. Once you get the hang of it and are confident about your knife work, you can stack two or three slabs before cutting strips, as long as the stacked slabs are stable and do not rock.

6. Cut into Cubes
The last step is to gather as many strips as you feel comfortable cutting at one time and make the final cuts to turn them into cubes.

Ode to the Tortilla

I love tortillas. It wasn't always that way. I am a child of the early 1960s. Then, on the East Coast, our food was influenced by two th...