Showing posts with label rice. Show all posts

Monday, June 24, 2024

Chicken and Sugar Snap Fried Rice

Fried rice is one of my favorite foods and over the decades, I've made a lot of versions. Just because the dish originated in Asia does not mean that fried rice has to follow an Asian flavor model. I made the following with leftover grilled chicken, sugar snaps, dill, chives, and lemon zest. The fresh herbs I threw in at the last second before plating. Then I zested a lemon on top. It was delicious

Chicken and Sugar Snap Fried Rice
with Dill, Chives, and Lemon Zest
Speaking of grilled chicken, Ann found a marinade that she wanted me to use consisting of onion, parsley, garlic, lemon zest, salt, pepper, and oil, all blended. After making this marinade, I realized that it is almost identical to the way I make jerk paste for chicken. My jerk paste is made from shallots, green onions, a Scotch bonnet pepper, allspice, fresh thyme, and oil. Aside from the flavoring, the idea of blending onions or shallots is pretty much identical.

Grilled Chicken

Tuesday, April 23, 2024

Lamb Chops and Gigantes Plaki

Spring is starting to arrive in fits and starts here in Bend although one day will be warm and sunny and the next brisk and cool. There's likely to be more snow to come but the grass is starting to green. And this is more than enough to get my grilling juices going after a winter of seeing the grill out by the patio under a mantle of snow.

Ann invited Michelle and Andreas over for dinner this past weekend, and Michelle's mom Jean was in town, so of course she was welcome too. I no longer remember the thought process behind the menu for the night, but I am pretty sure it was built around a bag of huge Royal Corona beans from Rancho Gordo.

Grilled Lamb Chops, Spinach with Onions and Dill on Gigantes
I decided to make these huge beans into the classic Greek gigantes plaki, baked beans in tomato sauce. I'm pretty sure that grilled lamb chops followed from this thought. After a sunny day that was great for cleaning up the grill after a winter of disuse, the sky turned partly cloudy and spit a little rain just before our guests were ready to arrive. Nonetheless, we turned on the fire pit and sat outside anyway.

Royal Corona Beans Soaking Overnight
Uncooked Huge Beans
After soaking the Corona beans overnight, I par-cooked them with a couple bay leaves, a few dried rosemary needles, and four smashed cloves of garlic. I started the beans at 2pm, knowing our guests would arrive at 6 and figuring it would probably be 7:30 before we sat down to dinner. At 5:45, I was a bit concerned about the beans. Although they had been softening constantly through the afternoon, three hours on the stovetop was insufficient to render them creamy. After another 90 minutes in the oven though, they were just fine. Whew!

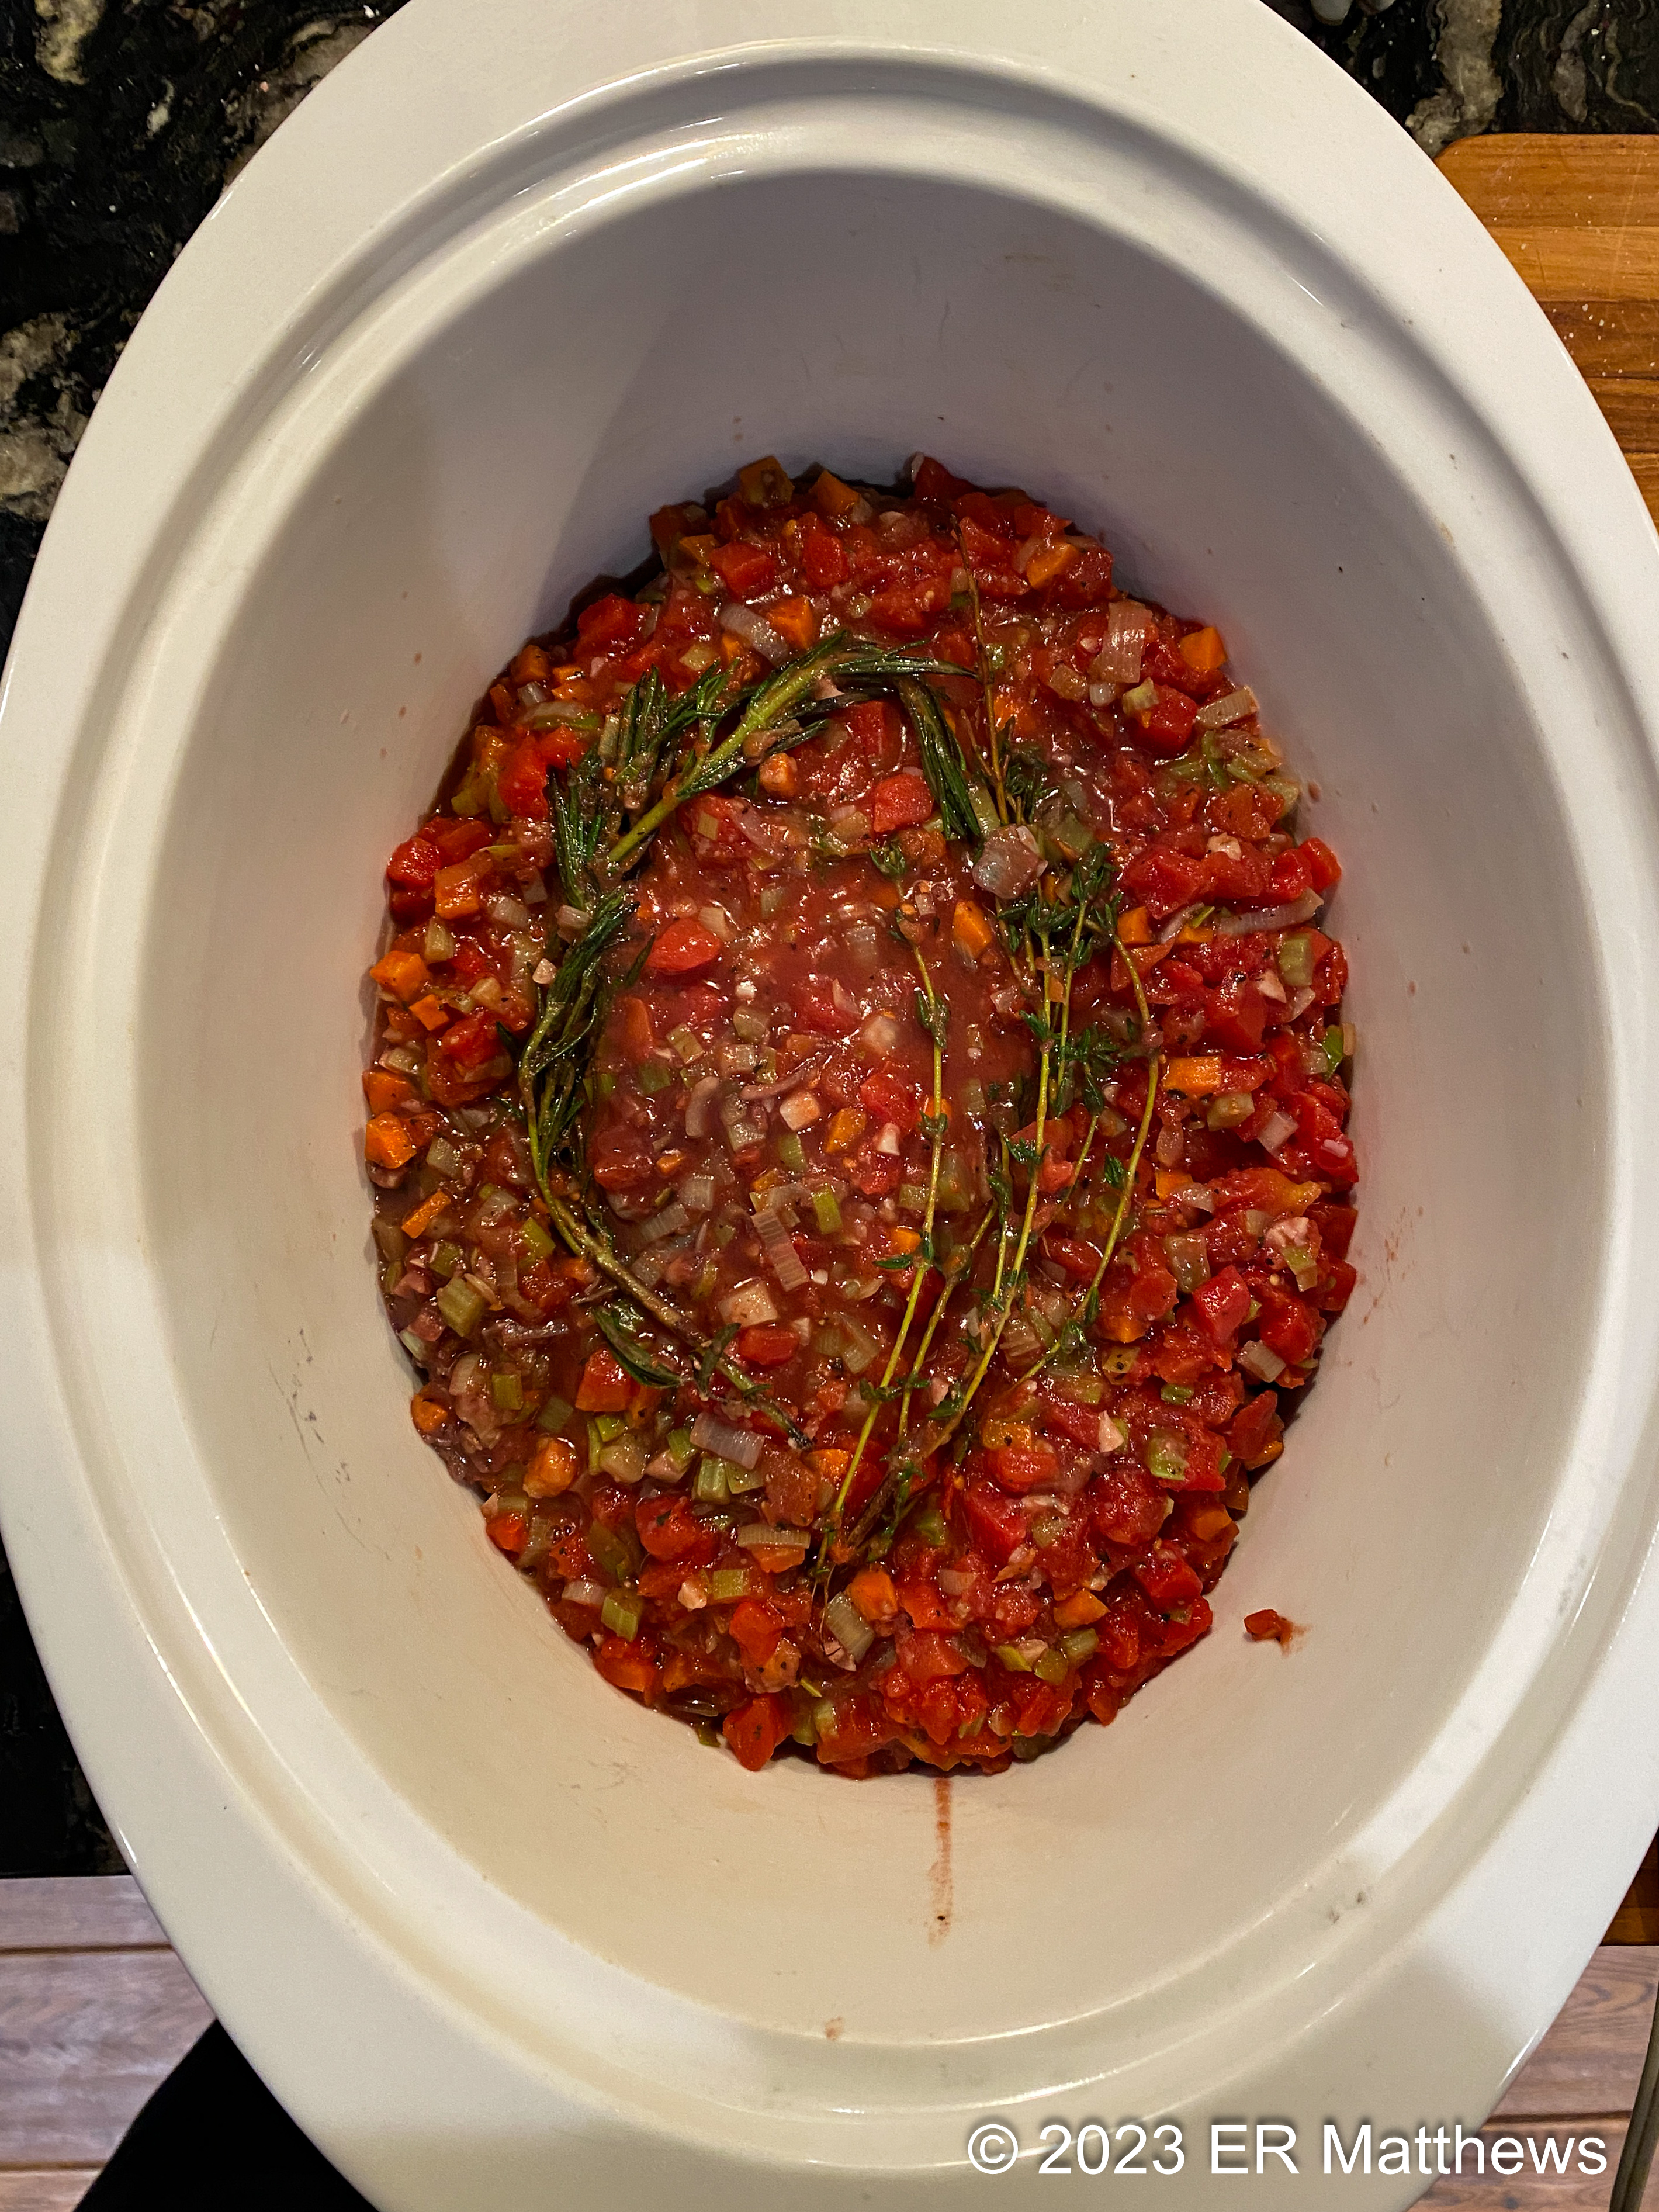
Tomato Sauce for Beans
I made a simple tomato sauce for the beans by sautéing an onion, a large carrot, and two stalks of celery in olive oil with garlic, crushed red pepper flakes, a bit of fresh thyme, and a fair amount of dried oregano. I also added ground cinnamon, just what would fit on the tip of a knife blade. To me, this dish doesn't taste right without it.

Ann, however, has a different opinion. She has a pretty firm rule that anything sweet or any spice that we Americans consider a pie spice does not belong in a savory dish. So, the sauce wasn't her favorite.

Once the vegetables had started softening, I stirred in a tablespoon of really amazingly concentrated Sicilian tomato paste called estratto. Then, I deglazed the pan with the juice of a lemon and added a can of crushed tomatoes and let the sauce bubble away for 20 minutes or so, just to bring the flavors together.

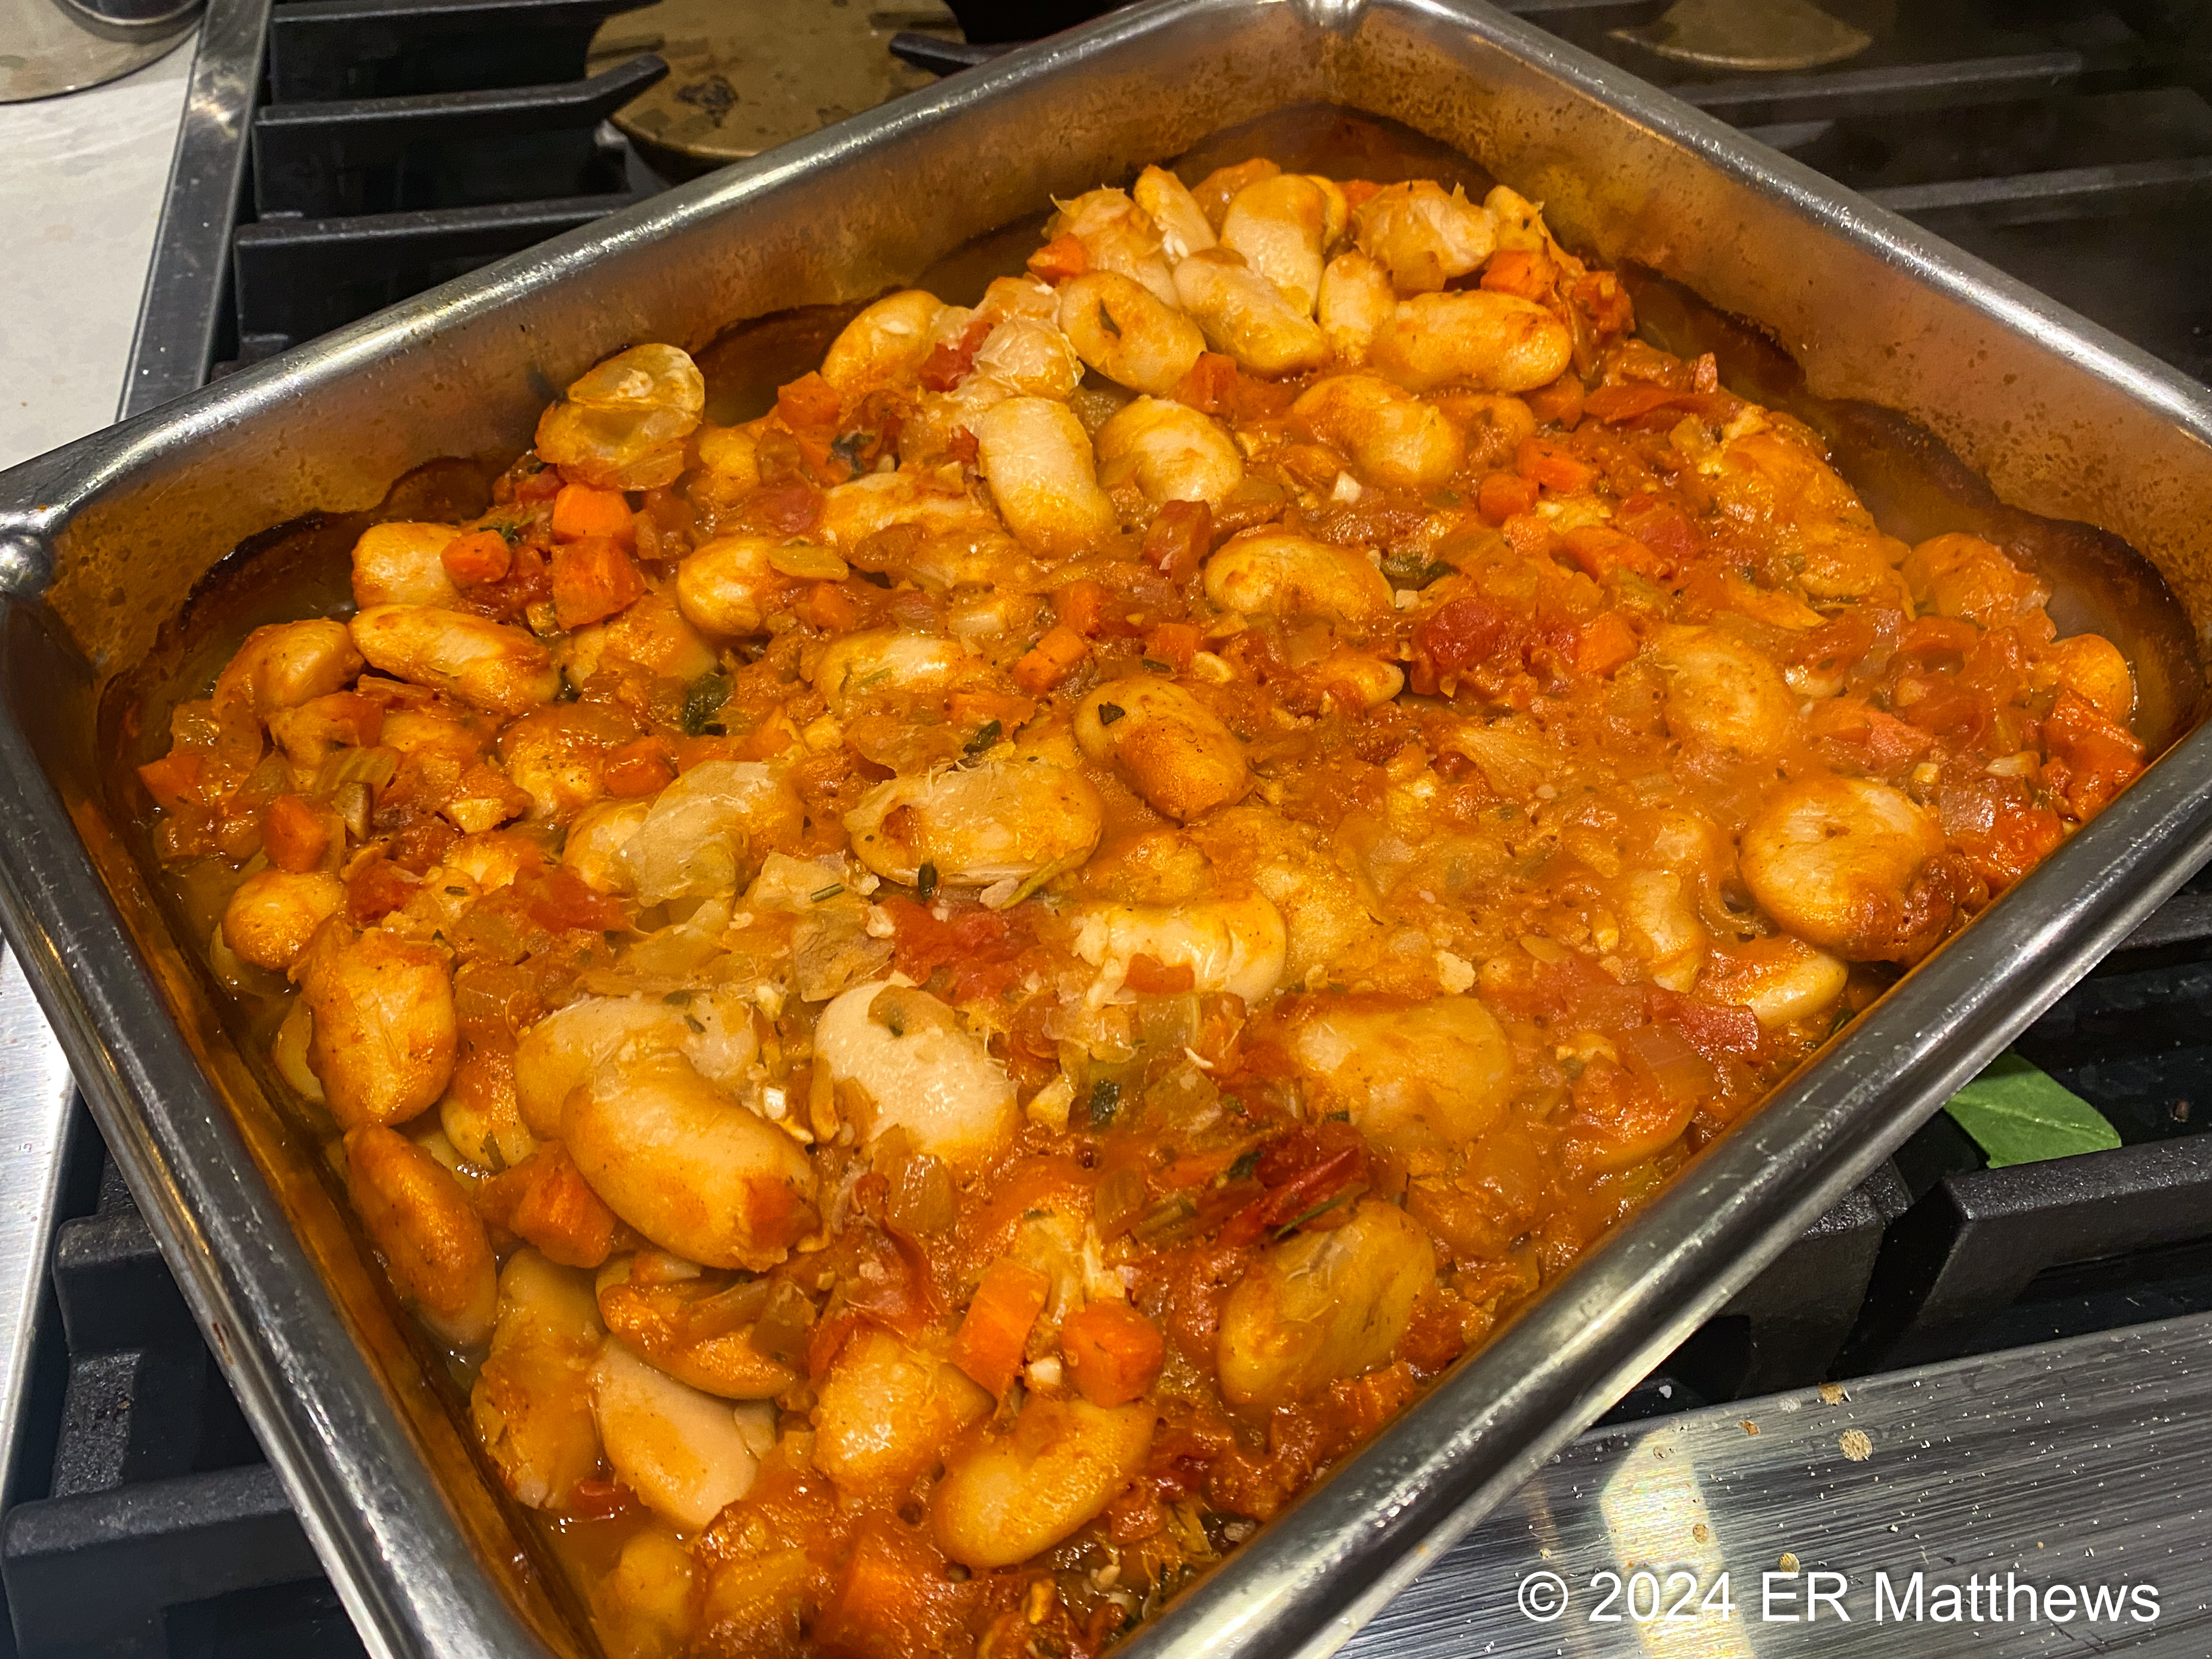
At 5:45, I scooped the still-cooking beans into the sauce and mixed them well. After transferring them to an oiled half hotel pan, I drizzled a little of the bean cooking liquid over the beans and covered the pan. They baked covered at 350F until dinner time, about 90 additional minutes.

Gigantes Plaki
Our guests arrived shortly after I put the beans in the oven and Ann had poured me a glass of wine, a Semillon-Sauvignon Blanc blend from Walla Walla. We headed outside on the patio by the fire pit with a plate of risotto cakes to have for an appetizer. I like finger food for an appetizer and because Michelle is gluten intolerant, bread such as crostini is out. So, I tend to make rice cakes when she comes over.

Plain Risotto Base: Arborio, Onion, White Wine, Chicken Stock
Lemon, Dill, Feta, and Pine Nut Risotto Cakes; Tzatziki
I made a plain risotto with chicken stock, though I often use water. When the rice had cooled, I added a lot of lemon zest and fresh dill, a good sprinkle of crumbled Greek sheep's milk feta, a handful of toasted pine nuts, and two raw eggs. After mixing the rice well, I shaped it into cakes and seared the cakes.

First thing in the morning, I made tzatziki to accompany the cakes. Each time I make tzatziki, I make it slightly differently depending on what I have on hand and how I'm feeling, but I did publish a basic recipe here.

A Touch Chilly Outside Around the Fire
First thing in the morning, I put a bunch of lamb chops in the fridge to marinade. The marinade was quite simple: olive oil, a splash or two of red wine, a lot of chopped garlic, dried rosemary, and dried oregano. I turned the chops in the marinade every couple of hours.

Lamb Chops Ready to Grill
Lamb Chops, Ready to Plate
After I grilled the lamb chops, we headed inside where I cooked a couple pounds of small spinach. I chopped an onion and cooked it to tender in olive oil, then tossed in the spinach which wilted in short order. I added a big handful of fresh dill and seasoned with salt.

I decided to plate at the stove rather than serve everything family style. I put a bed of gigantes on each plate and then scattered some feta, fresh oregano, and salt over the top. After garnishing the gigantes with a healthy drizzle of olive oil, I put some spinach on top and then added the lamb chops.

All in all, it was a very simple meal and scratched my grilling itch. I'm so glad that we were able to share it with Michelle, Andreas, and Jean.

Wednesday, January 31, 2024

Late January Dinner

In the past several months, we've pretty much stopped going out to eat at restaurants around Bend. The lousy food we have had in the past couple of years has made us really tired of spending a lot of money with almost no return. For myriad reasons, quality and consistency of restaurant food is lacking and so for our special meals lately, Ann and I have been cooking at home and inviting friends over to dinner.

This past weekend, I really had no overarching theme for the menu; I simply wanted to use (and use up) items that we had on hand already. In addition to a bunch of stuff to use up in the refrigerator, we have a pretty robust pantry that includes a great many items that we can use to cook whatever it is that we want.

Ann was in charge of cocktails and dessert. For cocktails, she made us one of her favorites, dirty martinis with blue cheese-stuffed olives. I am sorry to say that white liquor isn't my jam and although the cocktails were well made, I just couldn't drink mine and opened a bottle of Crémant d'Alsace to go with my appetizer. As much as I would like to be a martini guy, I am resigned to never being one.

Lovely Dirty Martini
Blue-Cheese Stuffed Olives

For appetizers, I had more Scottish cold-smoked salmon and sea trout caviar leftover from our aborted New Year's Eve celebration that I wanted to clear out of the refrigerator. So I envisioned an appetizer of smoked salmon, smoked salmon mouse, and sea trout caviar that is similar in many ways to the smoked salmon smørrebrød that I made a couple of weeks back when we got pounded by snow. Because this appetizer needed to be gluten-free, I cut cucumbers on the bias to mimic crostini. 

Smoked Salmon, Smoked Salmon Mousse, and Sea Trout Caviar

For the main part of our meal, it was pretty much a no-brainer that we were going to have pork tenderloin. A recent foray to Costco saw a package of four tenderloins come home, two of which were salted away in the freezer, leaving two more in the fridge that needed to be cooked. I decide to stuff a tenderloin with goat cheese and spinach and wrap it in prosciutto, a technique that I developed for the restaurant and which is documented in a separate post for anyone curious about how to do it.

The beauty of this dish is three-fold: it looks a lot more complicated to pull off than it is, it looks beautiful, and you can prep it well in advance, leaving only the final roasting to be done and freeing up your time to visit with your guests.

Searing the Prosciutto-Wrapped Stuffed Pork Tender
(cut in half so it would fit into the pan)
Seared Pork Tenderloin Rolls, Prepped in Advance, Ready to Roast
To accompany the pork, I turned to our pantry where I found the tail end of three separate bags of Arborio rice that I wanted to use or consolidate. Moreover, we just ran out of dried porcini and ordered a new bag which is more than will fit into the canister. I wanted to use the overflow that would not fit in the canister and so it seemed pretty natural to make an earthy risotto to go with the pork.

One of the neat things about risotto is that you can par-cook the base about ten minutes and let it cool. This then means that it will only take 8-10 minutes to have the risotto ready. In other words, all I had to do when guests were over was spend ten minutes at the range finishing the risotto while the pork roast cooled and rested. I spent the rest of my time socializing and enjoying the evening.

I get really tired of chefs making out like risotto needs some kind of crazy voodoo to pull off correctly and that it takes far too long to prepare to put it on the menu. In fact, I have good friends who run a restaurant whose menu claims that a simple plate of risotto will take the kitchen 45 minutes to make, and oh by the way, that will be $45 for the plate. Ridiculous. I love you guys, but that's ridiculous.

Spinach and Goat Cheese Stuffed Pork Tenderloin on Porcini Risotto
Ann asked also that I reprise the salad that I made last weekend and I obliged her. She just really loved the combination of ingredients: greens, spiced pecans, pomegranate seeds, and pickled shallots all combined with a pomegranate-pickled shallot vinaigrette. You can find all the salad magic covered in prior posts: spicing pecans, pickling shallots, and making the vinaigrette. 

Greens with Pickled Shallot and Pomegranate Vinaigrette
In keeping with the theme of using up, I remembered that for the holidays, Ann had prepped a batch of her delicious shortbread made with orange zest, rosemary, olive oil, sea salt, and very little sugar. Unfortunately, she became sick before she could do all the baking that she wanted to do. I suggested that we take the remaining log of dough from the freezer, cut it into discs, bake them, and then dip the shortbread cookies in melted chocolate for an easy finish to dinner. I sliced; Ann baked; I melted the chocolate and dipped the cookies; and Ann applied sea salt to the chocolate. Tag team and done!

Chocolate-Dipped Orange-Rosemary-Olive Oil Shortbreads
As a final thought, I love having leftovers in the refrigerator that can be repurposed into another meal. The following evening, I formed some of the leftover risotto into cakes that I crusted in a pan while gently rewarming the two remaining slices of stuffed pork tenderloin. While I poached four eggs, I whipped up a little of my pimentón sauce with which to finish our dinners of leftovers.

Leftovers: Stuffed Pork Tenderloin and Risotto Cake
Topped with Poached Eggs and Pimentón Sauce 

Sunday, December 3, 2023

Dreaming of Italy

Ann and I have been planning a big vacation for years now, ever since our last major vacation of nearly two weeks in Alaska (Anchorage area and the Kenai) in 2021 during a gap between COVID outbreaks. Our next big trip will be next fall, tentatively a big circle of northern Italy from Firenze to Bolzano and back, taking in sights in Toscana, Emilia-Romagna, Lombardia, il Veneto, and the star of the show, i Dolomiti (Tyrolean or Dolomitic Alps) of Trentino-Alto Adige (Südtirol).

A goal of this trip for me as a chef will be to get off the beaten path and sample local dishes that will continue my education into and expand my repertoire of Italian regional cuisine. As an aside, I doubt very much that I will be ordering classic dishes in Italy as I have cooked them all and so they no longer pique my curiosity.

Because of all this trip planning, we are thinking of all things Italian. It is perfect timing then, that this week when looking through the meat section of the grocery, I saw some particularly good looking beef shank cut for osso buco, the classic braised dish of Lombardy and Milan, in particular. I don't think our itinerary will include a stay in Milan, but still, I never can resist making this milanese classic when I have the opportunity. Served on a bed of risotto milanese (saffron risotto) with a bottle of Barbaresco, this dish was a delightful counterpoint to our crappy snowy and rainy winter weather last night.

Ossobuco on Risotto Milanese
I've made several posts on this blog and I'm sure other posts on the restaurant blog about osso buco. I've made lots and lots of very different versions from many different kinds of meat (veal, beef, elk, venison, bison, pork, cinghiale (wild boar), and others). This post goes over the way that I most often make it at home, braised in wine, tomatoes, and aromatics. This is in contrast to at the restaurant where it might have been braised in demiglace and porcini and then finished with truffles. In other words, this is my rustic, casalinga version.

Home-Style Ossobuco

This recipe describes braising the ossobuco in a slow cooker. There is absolutely no reason why this could not be cooked slowly on the stovetop or in the oven using a dutch oven or other covered braising pan. At the restaurant, we used flat hotel plans covered in aluminum foil; in other words, no fancy equipment needed. If you are going to braise in a pan, you can (and should) brown the meat and the aromatics directly in the braising pan.)

1/4 cup all purpose flour
1/2 teaspoon Kosher salt
large pinch coarse black pepper
2 large shank portions (mine were extra large and weighed in at 2.8 pounds/1.25 kg)
olive oil to film a skillet or sauté pan
1 large leek, finely chopped
1 large carrot, in small dice
1 large stalk celery, in small dice
6-8 large cloves garlic, minced
1 sprig fresh rosemary
1 sprig fresh thyme
1 tablespoon dried thyme
1 cup/250ml (1/3 bottle) dry red wine
1 28oz can of diced tomatoes and their juice

The steps, illustrated below, are simple. Dredge the shanks in seasoned flour and brown. Cook the aromatics and herbs. Add the remaining dredging flour and cook it a bit. Deglaze with red wine and add the tomatoes. Combine all the ingredients and cook slowly until the meat is fork tender.


When selecting ossobuco, if you have a choice, always look for the slices that are more meat than bone. There is little more disappointing than being served a piece of ossobuco that is almost all bone, which is sadly what a lot of grocery store ossobuco amounts to. Too bad that we have no place to buy veal ossobuco, however, the beef ossobuco in the photo above is as pretty as I have ever seen.


Mix the flour with the salt and pepper and cover both sides of the shanks in flour, knocking off any excess. Brown over medium heat until well colored on both sides.


While the beef is browning, if you have decent knife skills, you will have plenty of time to prep the aromatics. In the winter when leeks are in season, I prefer to use leeks rather than onions. Of course, onions work just great too. I prefer fresh herbs in general for this dish. The exception is basil in this winter season when fresh basil is scarce.

Seasoned Flour, Red Wine, and Tomatoes
I'm really picky about my tomatoes and I have my favorite brand. I tend to use very finely diced tomatoes packed in juice, though it would be no problem to use whole romas and crush them slightly using your hands or a food processor. As for wine, I do not cook with the same wine that I want to drink with the dish, the opposite of what some people recommend.

The wines that I like to drink are far too expensive and delicate to be cooking with. Moreover, the reason for the wine in the dish is simply to supply some acid to help break down the meat, and any reasonably priced well made wine will do this for you. For white cooking wine, I buy inexpensive dry box wine because we never have any leftover white wine (for we rarely drink white wine and pretty much never in winter).

For red wine, we are always buying sample bottles to see if we want to buy case quantities for the cellar. Invariably, we have bottles that while being decent wines, simply are not to our taste. Those become cooking wines. The Matthews wine in the photo above, we bought on a lark merely because that is my surname. Sadly, it was not to our taste despite being highly rated by the wine talking heads.


After the meat is browned, cook the aromatics and herbs in the same pan, being sure to scrape up all the brown meat bits off the bottom of the pan. These bits have amazing flavor that you want in your braise. When the vegetables are soft, add the remaining dredging flour, stir it in, and cook it for another minute or two. Then deglaze (use the liquid to get any solids off the bottom of the pan) with the red wine and add the tomatoes. Stir all the ingredients well. Then if you are using a slow cooker, pour the sauce over the meat. If you are braising on the stovetop or in the oven, nestle the meat into the sauce. Cover and cook at low heat.


Above, you see the meat after it has been browned, then covered in sauce before cooking, then after braising for seven hours. The meat was done after about six hours on low in the slow cooker, but I wasn't ready to eat then, so I let it go for another hour. On the stovetop or in the oven, I would guess that the dish would be ready in about three hours. To tell if it is done, stick a fork in it and if you meet no resistance, it is ready.

A final note about salt. You will notice that this dish contains but a half a teaspoon of Kosher salt, not enough to season it. So, when it is done, you will need to taste and season the sauce according to your liking. I specify seasoning the dish after cooking because when you braise, you gradually lose liquid volume to create a silky, unctuous sauce. If you season to taste before the liquid cooks off, the finished product is going to be hella salty.

Parting Shot: Risotto Milanese Starting to Cook
As I mentioned before, I served the ossobuco on risotto milanese with a great Nebbiolo wine, a Barbaresco. Sadly, I cannot really go into making risotto in a blog post. It, like making biscuits or handmade pasta, takes hands-on experience to learn the feel of the dish.

Wednesday, November 1, 2023

Paella Party

Ann had wanted me to make a paella for her 60th birthday, but we just could not get large enough group together for such an event at that time. We instead went to Walla Walla wine country to celebrate her birthday and postponed the paella party until the end of October. My large paellera makes enough rice to feed a good 16 people, so it's overkill to make a paella for a small group. Besides, more people is more fun.

Paella Mixta
At its heart, paella is very simple: short-grained rice cooked in broth in a wide, open pan. And thus it depends primarily on two things: the quality of the rice and the quality of the stock used in cooking that rice. I started the day before in making a couple gallons of stock in our big stock pot. For paella, I make stock that complements the garnishes in the paella. So, for example, if I am making a traditional Valencian rabbit paella, I would use rabbit stock. In this case, I wanted to make a paella mixta with chicken, chorizo, and shrimp, so I made a mixed stock.

Starting the Stock; Eight Hours Yet to Cook
In my restaurant days, we would have lots of things laying around for making stock (and sometimes purposefully intended for stock). At home, I start by raiding my freezer in which I collect various bits intended for later use. In this case, I found a whole pork upper shank that I had been saving as well as a bag of trim from frenching a pork rack. Whenever I french a rack by totally denuding the rib bones for presentation purposes, the trim either ends up ground for sausage or other charcuterie or it ends up in the stock pot.

To the pork hock and the rib trim, I added a bunch of pork neck bones, sliced pig's feet, chicken wing tips (from prepping the chicken wings for the paella), shrimp shells (from prepping the shrimp for the paella), a bundle of parsley stems, carrots, celery, saffron, and garlic cloves and peels. Then I added a quart each of chicken stock and clam juice and topped the pot off with water and onto the stove it went to gently simmer for about eight hours, until the giant pork hock was fully cook and fall-apart tender.

When the stock was done, I separated the solids from the broth, mainly in an effort to get the stock as cool as possible as quickly as possible. Nobody wants a foodborne illness from warm stock sitting around growing bacteria. I lightly salted the stock before putting it away. When making paella, I find it easier to control the salt by pre-salting the stock lightly (it will reduce and concentrate the salt) than by trying to guess how much salt to add to the paellera.

At the point when I could bear to put my hands on the hot solids, I picked and reserved all the useable meat. Truth be told, I made more stock than I needed to have leftovers for a great pot of soup, which I did in fact make later in the weekend using the leftover pork meat. You can almost never have too much stock on hand and if you do, you can always cook it down to glace or demiglace and freeze it.

Appetizers: Meatballs in Romesco, Marcona Almonds, and Olives
Despite there being enough paella to feed a small army, Ann and I thought that we should provide some appetizers for our guests that they could munch while I was outside on the patio cooking. The morning of the paella, I made a batch of pork meatballs (pork, parsley, garlic, oregano, basil, and red wine) and that afternoon, I braised them in a big batch of romesco (roasted red peppers, garlic, almonds, white bread, sherry vinegar, and olive oil). These we set out with Marcona almonds (the best!) and some green olives. Simple, but tasty.

Paella Mise en Place from lower left: Vegetables (Piquillos, Onion, Poblano),
Rice, Olive Oil, Chicken Wings, Lima Beans, Shrimp, Salt, Diced Hard Chorizo,
Mix of Parsley/Garlic, and Mix of Pimentón/Saffron
Just before our guests arrived, I lit the fire outside and put out my mise en place for the paella with no fear of lack of refrigeration: it was only about 40 degrees outside and the sun was sinking fast. It would be in the low 20s by morning. The ingredients that I use in my paella vary each time and are certainly non-traditional. I started by learning how to make traditional paella valenciana and now I make my own to suit my mood. I feel lucky not to be bound by the strictures of custom and family pressure to make paella just so.

Preheating the Paellera
Everyone who saw my steel paellera (I love this 55cm Pata Negra from Garcima in Spain) heating on the fire pit on our patio mentioned how perfectly the pan fit on the fire pit. Actually, it was the other way around. I have never cooked a paella on gas before, always lighting a wood fire in the back yard. In our new home in Bend, we have no back yard or really any yard (a plus for travelling), just a patio in the courtyard of our house. And lighting a real fire on our patio wouldn't be all that awesome: we get enough smoke in the house during wildfire season. So, we actually measured the tripod on which the paellera stands and bought a round fire pit that would accommodate it. How is that for planning?

I'm going to say now that I did not make my best paella over the gas. I need more practice to get the perfect soccarat, the crust on the bottom, which I scorched a bit this time. Counterintuitively, I feel like I had better control using a wood fire that I could adjust by moving wood in or out as necessary. I will say that the wind guard around the fire pit really helped with a more even flame. Although I did have to rotate the paellera a bit during cooking, I didn't have to be constantly fiddling with it as I have in the past over a wood fire with an uncontrolled breeze.

Step 1: Brown the Chicken Wings
Steps 2 and 3: Sauté the Vegetables, Then Add the
Pimentón, Saffron, Garlic, and Parsley
Step 4: Add the Stock and Bring to a Mild Boil
Step 5: Add the Rice
Step 6: Add the Shrimp and Lima Beans
Here, you see the cooking paella with all its garnishes (notice how low the flame is now compared to the previous photos), the last to go on the dish are the garnishes that take the least amount of time to cook, the shrimp and the butterbeans/lima beans. The beans are a nod to traditional paella valenciana to which many would add a white bean called the garrofó, or another white bean, or even flat green beans that resemble our romano beans. I'm pretty sure that a traditionalist would cast an evil eye upon these alien beans while silently acknowledging that they taste pretty good in a paella.

Artsy Shot: Flames Glowing Beneath the Paellera

It was well and truly dark by the time the paella finished, at which point, we all migrated into the kitchen where I covered the paella with a towel and let it rest for ten minutes before serving. All eight of us (Ann and I, Rob and Dyce, Andreas and Michelle, and Mark and Kelly) gathered around the big island in the kitchen and dug in to the appetizers and the paella, with lots of red wine poured all around. To finish off the evening's meal, Rob made a delicious apple and green chile pie, with green chiles from Socorro NM that they purchased on their last trip to Santa Fe where they used to live prior to moving to Bend a year ago.

Rob Made This Outstanding New Mexican Apple-Green Chile Pie
Served with Vanilla Ice Cream
We had a great time. I only wish that I hadn't been so busy cooking because I would have liked to have been a bit more present with our guests and to have had the presence of mind to have taken people photographs. This post seems way more clinical than I had wanted for lack of photos of the socializing that took place all evening. Now that the paella is out of the way and it's too dark too early to make a paella until next spring, I'll revert to dishes that do not take active cooking so that I can relax and socialize.

Ode to the Tortilla

I love tortillas. It wasn't always that way. I am a child of the early 1960s. Then, on the East Coast, our food was influenced by two th...